How to Setup SFTP Server on Debian 12
In this guide, we will show you how to setup sftp server on Debian 12 step-by-step.
SFTP stands for Secure File Transfer Protocol / SSH File Transfer Protocol, it is one of the most common method which is used to transfer files securely over ssh from our local system to remote server and vice-versa. The main advantage of sftp is that we don’t need to install any additional package except ‘openssh-server’, in most of the Linux distributions ‘openssh-server’ package is the part of default installation. Other benefit of sftp is that we can allow user to use sftp only not ssh.
Prerequisites
- Pre-Installed Debian 12
- A local user with admin rights
- Internet Connectivity
Without any further delay, let’s deep dive into SFTP Server installation step on Debian 12.
1) Install OpenSSH Server Package
Sftp is part of openssh server, so for sftp setup we must install openssh-server package using apt command. Open the terminal and run following apt commands
$ sudo apt update
$ sudo apt install openssh-server -y
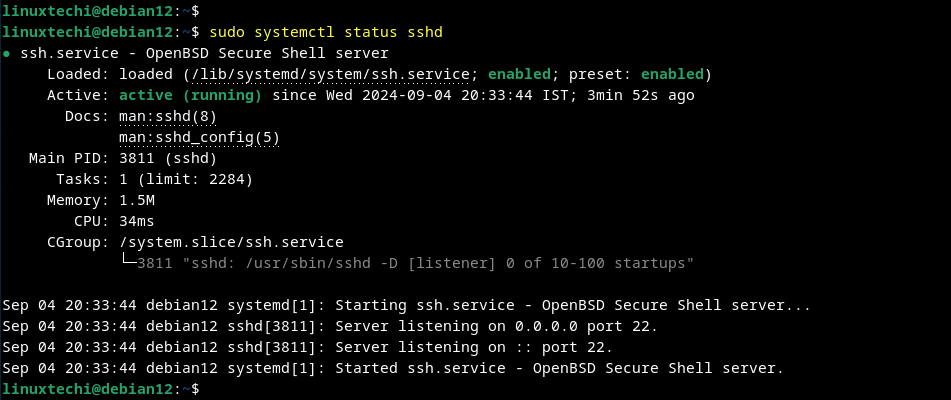
Once the package is installed, sshd service will start automatically.Execute below command to verify the status of ssh.
$ sudo systemctl status sshd

2) Create a Group and User for sftp
It is highly recommended to create a dedicated group for sftp, in our we are going to create “sftp_grp” group using groupadd command.
$ sudo groupadd sftp_grp
Next, create a local user with name “pkumar” and map this user to the group “sftp_grp” and assign the shell “/usr/sbin/nologin”
$ sudo useradd -m -G sftp_grp -s /usr/sbin/nologin pkumar
$ sudo passwd pkumar

Note: Shell “/usr/sbin/nologin” ensures that user can not ssh but can use sftp.
3) Setup SFTP Server on Debian 12
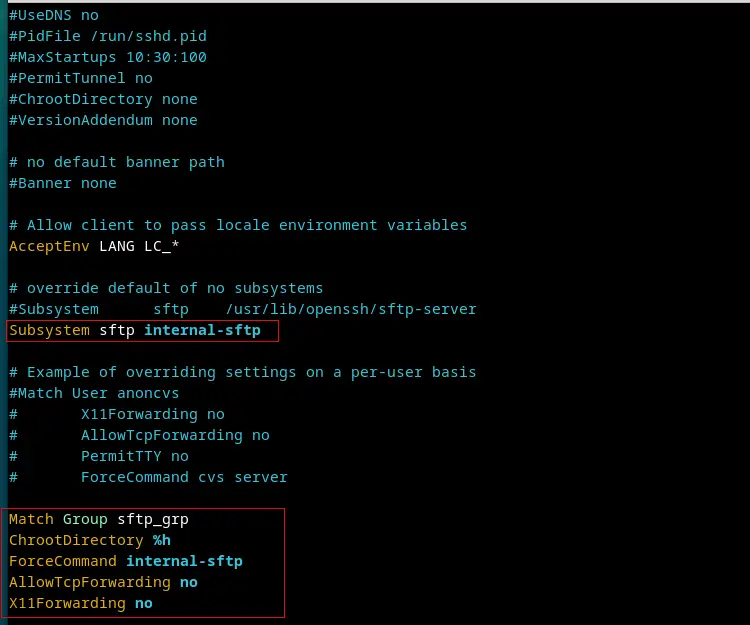
As we have installed openssh-server and created required group and user, let’s configure sftp by editing the file “/etc/ssh/sshd_config“.
Use the text editor and add the following content to end of file.
$ sudo vi /etc/ssh/sshd_config

#Comment Out Below line and a new line
#Subsystem      sftp    /usr/lib/openssh/sftp-server
Subsystem       sftp    internal-sftp
#Add following lines to end of file.
Match Group sftp_users
ChrootDirectory %h
ForceCommand internal-sftp
AllowTcpForwarding no
X11Forwarding no
save and close the file

To make above changes into the affect, restart ssh service using following systemctl command.
$ sudo systemctl restart sshd
In above ‘sshd_config’ file we have commented out the line which starts with “Subsystem” and added new entry “Subsystem sftp internal-sftp”.
- “Match Group sftp_grp” –> It means only the members of sftp_grp is allowed to used sftp
- “ChrootDierctory %h” –> It means users can only change directories within their respective home directories, they cannot go beyond their home directories, or in other words we can say users are not permitted to change directories, they will get jai like environment within their directories and can’t access any other user’s and system’s directories.
- “ForceCommand internal-sftp” –> It means users are limited to sftp command only.
4) Create Uploads Folder and Set Permissions
Set the required permissions on user’s home directory using chown and chmod commands.
$ sudo chown root:root /home/pkumar
$ sudo chmod 755 /home/pkumar
Next, create a uploads folder where the user will upload files. Set the required permissions on this upload folder using chown commad.
$ sudo mkdir /home/pkumar/uploads
$ sudo chown pkumar:sftp_grp /home/pkumar/uploads
5) Test Sftp Server
Now that the SFTP server is set up, it’s time to test the sftp server. From a client machine, use an SFTP client like FileZilla WinSCP, or test directly from the command line:
$ ssh [email protected]

Above command output confirms that user is not allowed to SSH , now try sftp using following command.
$ sftp [email protected]

Let’s try to upload a file using put command.
sftp> put datamig.zip
Uploading datamig.zip to /uploads/datamig.zip
datamig.zip 100% 7091 1.1MB/s 00:00
sftp>
Try to change the directory,
sftp> cd /root
Couldn't stat remote file: No such file or directory
sftp>
Above output confirms that we are able to upload a file from our local system to sftp server and apart from this we have also tested that users cannot change directories.
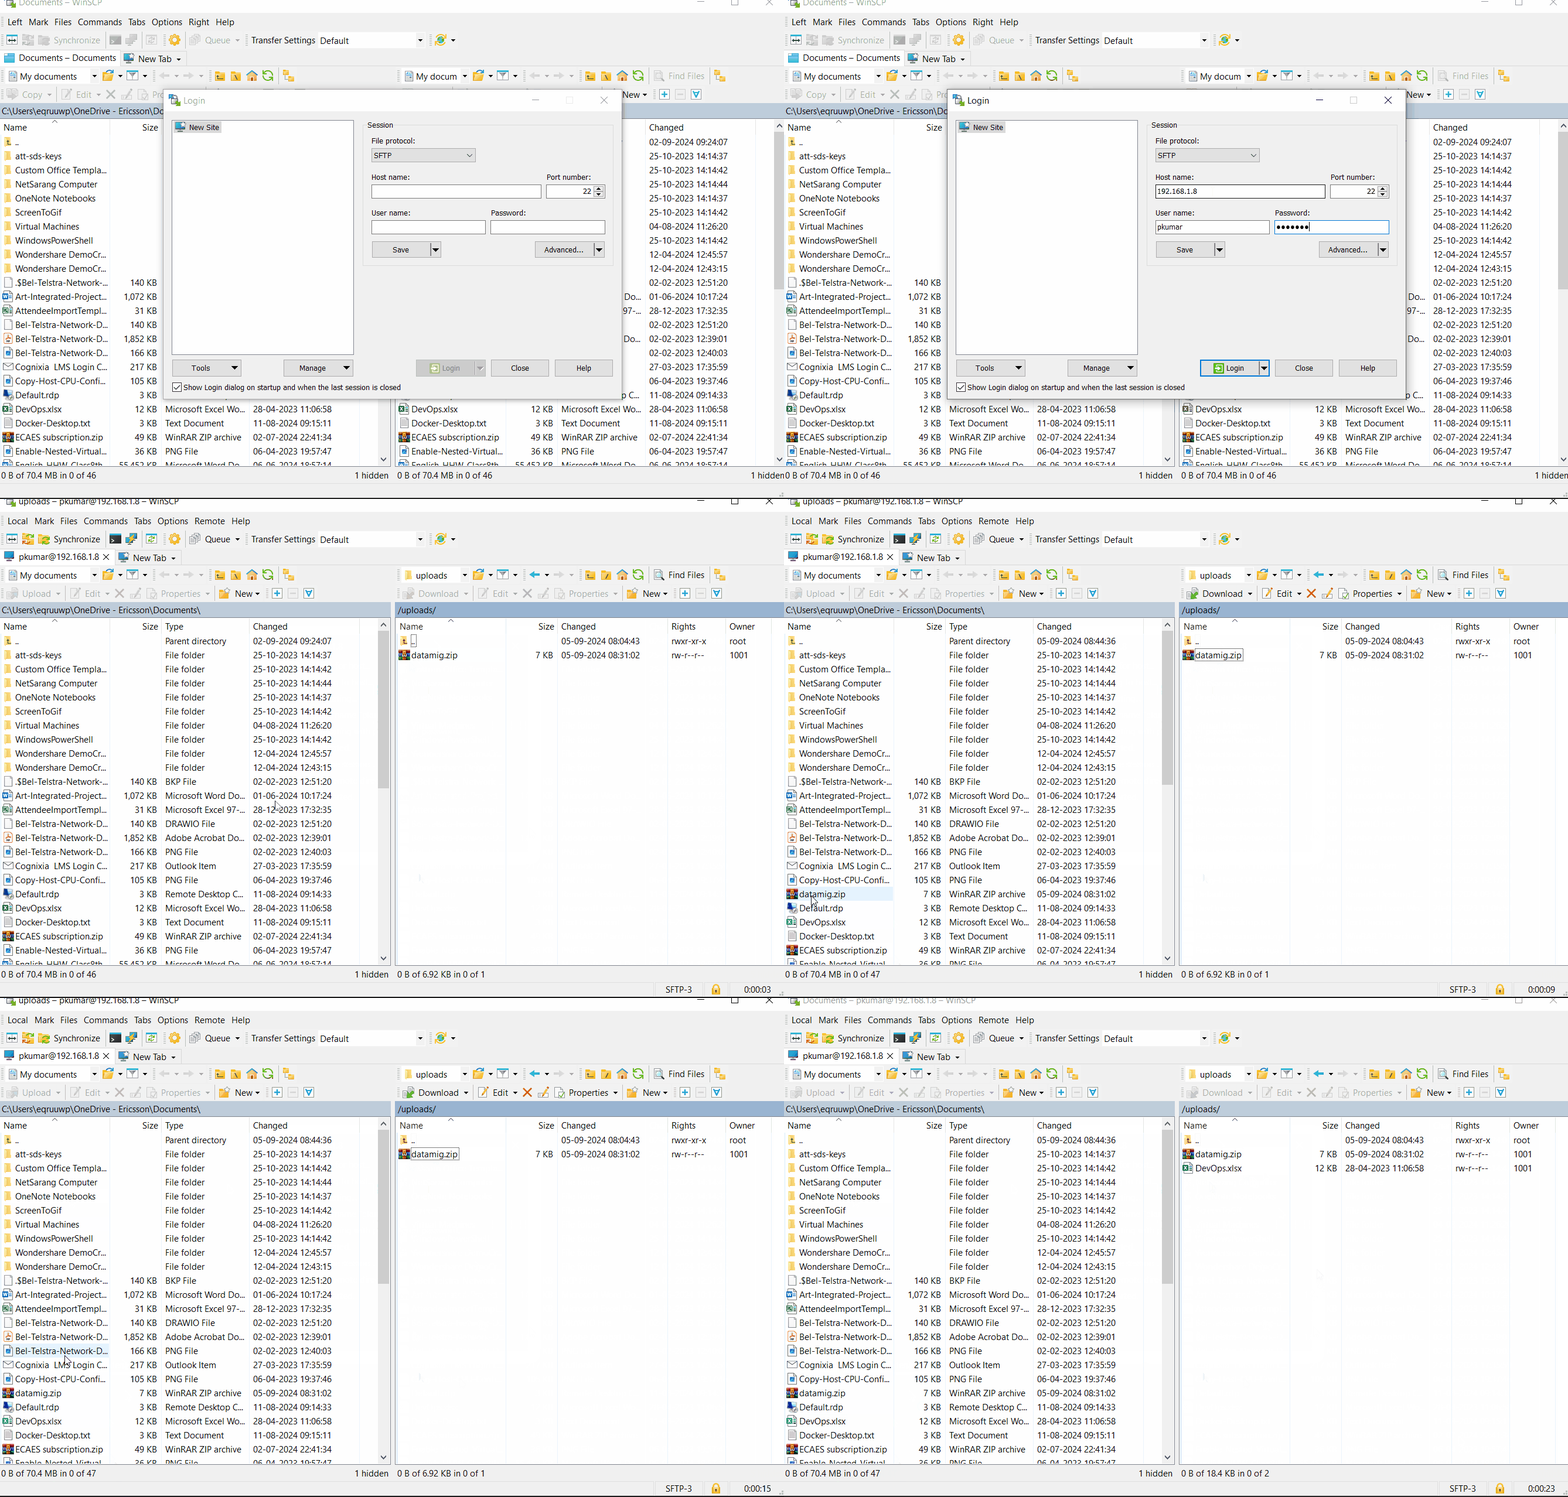
Let’s try to test SFTP server connection using winscp.
Enter the sftp server ip address along user’s credentials, example is shown below:

Above window confirms that downloading and uploading a file is working fine. This shows that we have successfully setup SFTP Server on Debian 12.
We hope you have found these instructions helpful, feel free to post your queries and feedback in below comments section.
Also Read: How to Install Ansible (Automation Tool) on Debian 12
