How to Install Arch Linux on VirtualBox – LinuxWays
Running different operating systems on a single system brings a lot of convenience for testing and developing different applications. There are a number of software that can be used to create virtual machines one of which is virtual box. This tool is capable of running multiple operating systems on a single computer, if necessary, resources are allocated to every operating system. The process of installing Arch Linux on VirtualBox is quite lengthy but it is easy to follow, and this guide will explain it in detail.
Contents:
- Install Arch Linux on VirtualBox
- Download Arch Linux ISO
- Create a Virtual Machine
- Install Arch Linux
- Configure Arch Linux
- Cloning Arch Linux on VirtualBox
- Removing Arch Linux From VirtualBox
How to Install Arch Linux on VirtualBox
Arch is one of the Linux distributions that comes with rolling updates which means that to install the newer version you just have to update it using its terminal instead of installing the new version, unlike other Linux distros. Before installing Arch Linux, it is mandatory to look for the minimum requirements that should be met to run it smoothly:
| Specifications | Minimum Requirements |
|---|---|
| RAM | 512MB minimum and 2GB recommended |
| Storage | 2 GB minimum and 20 GB recommended |
| Architecture | An x86_64 supported system |
To simplify the process of installing Arch on VirtualBox I have divided the whole process into small steps for better understanding:
Step 1: Download the Setup File for Arch Linux
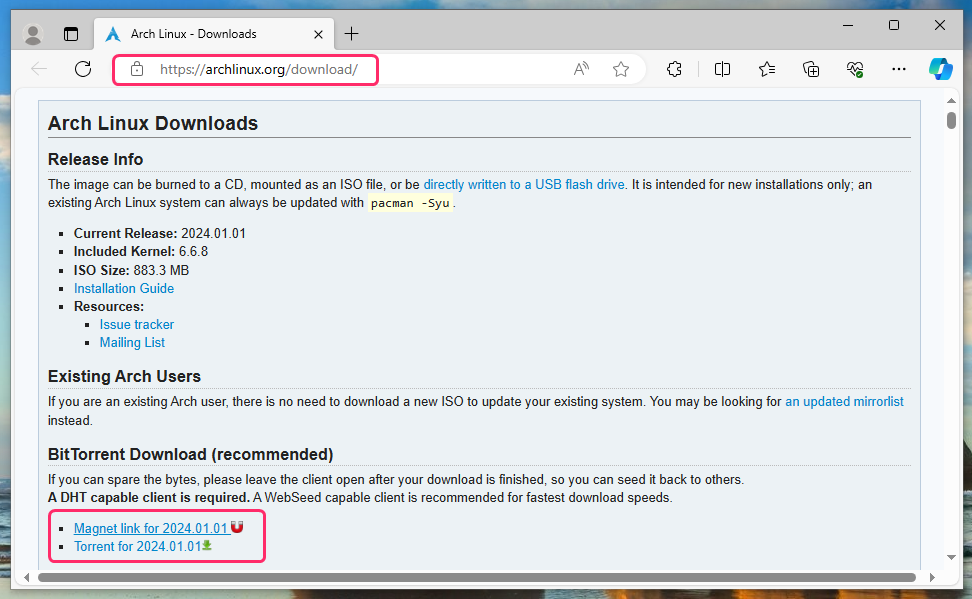
Just like every other operating system to install Arch Linux, you have download its setup file and for that visit its official website download page:
To download the operating system file, you need to have any torrent application installed on your system. To download Arch Linux either click on the magnet link to load it directly to the torrent application or download the torrent and load it manually.
Step 2: Create a Virtual Machine on VirtualBox
Once the Arch Linux ISO file is downloaded, launch the VirtualBox and start the process of creating a new virtual machine. For that simply click on the New option on the top menu bar and after that give the operating system its name and set its location where you want to install it:

To install VirtualBox on any operating system visit its official website download page, once you have set the name of the operating system its type and version are selected automatically, and then click on next:

Here you can also give the path for the ISO file of Arch Linux, but it is not necessary as when you start this virtual machine the VirtualBox will require an Arch Linux setup file. Next allocate the RAM and CPU resources for the Arch Linux, here I have allocated 9GB RAM and 5 CPUs for it, you can allot resources depending on your system specifications:

Now allot the storage space for the Arch Linux, here I have allocated around 30 GB which I think is sufficient as sometimes it gives the warnings for low disk space if the storage is around 20 GB.

Now click on Next and review all the details for the virtual machine and after that click on Finish:

Step 3: Install Arch Linux on VirtualBox
Once you have created the virtual machine, click on the green arrow icon to start the installation, now the VirtualBox will ask for the ISO file so add the path of the current directory and then click on Mount and Retry Boot:

Now select the first option which is Arch Linux Install medium (x86_64, BIOS) to prompt the installation of Arch:

Now check the availability of the internet by sending packets to any website using the ping command, here for illustration I have ping Google:

If the ping command is not successful, which is quite a rare case, then you need to check your internet connection and its settings. Next update the packages list for the default package manager of Arch Linux which is pacman, so the installation process goes on smoothly:

Now install the public keys that will be used to authenticate the packages from the Arch repository and for that execute:
pacman -Sy archlinux-keyring

To install Arch Linux, we have to set the configuration of Arch as we did while creating the virtual machine on VirtualBox so execute:
Upon the execution of the above command, you will come across the Arch configuration menu where you can set your username, password, network configuration, disk configuration, display settings, and more:

So now start one by one as by default the language is pre-set to English you can change the language if you want to choose any other language. Next, click on the Disk configuration, and from there select the use a best effort default partition layout:

Now from here select the first drive having the space we allocated while creating the virtual machine:

Next, select the type of file system that you want to set here you will see the four options and each has its own significance:
- Btrfs: This file system is compatible with the new standards which come with cutting-edge capabilities and features such as snapshots, compression, encryption, deduplication, and RAID. Its design makes it flexible, and scalable and lets it handle huge quantities of data quote efficiently.
- Ext4: It is the most widely used file system in Linux and the default choice for many distributions. It supports features such as journaling, extents, large file support, and delayed allocation.
- xfs: It is a high-performance file system that was originally developed for large-scale enterprise systems. It excels at handling parallel I/O operations and large files. It supports features such as journaling, allocation groups, online defragmentation, and metadata checksums.
- F2fs: It is a relatively new file system that was designed specifically for flash-based storage devices, such as SSDs and SD cards. It aims to optimize the performance and lifespan of flash memory by reducing write amplification and wear leveling. It supports features such as multi-head logging, adaptive logging, and garbage collection.
Here I have selected btrfs file system as it offers the most advanced and versatile features among the four options, and it can handle various scenarios and workloads. Btrfs also has the advantage of being able to create and manage subvolumes, which are like partitions within a partition. This can be useful for creating snapshots, backups, or testing different configurations. Btrfs is also compatible with VirtualBox, and it can be easily resized or converted from other file systems.

Once you have selected the desired file system now prompt the selection of subvolumes with default structure because you can create snapshots of your system state and restore them easily, which is useful for testing, backup, or recovery purposes or you can use different compression or encryption options for different subvolumes, depending on your needs and preferences and resize or add new subvolumes without affecting the existing ones, which gives you more flexibility and scalability.

Now allow the btrfs file system compression as it can help reduce disk space usage and improve the performance of the file system by reducing the amount of data that needs to be read or written:

Next, set the password for the administrator account for Arch Linux, and from there go to the Root password option and set your password:

Usually, it is recommended to set a strong password that is hard to crack but if you set a weak password the system will ask for the password a second time as well just for confirmation:

Now you need to create a user account for Arch Linux and for that click on the User account option:

Next, to create a new user click on the Add a user option, and set its name and password after that the system will ask to set this account as an administrator, and if you want to give this account administrator privileges choose yes.

Next, you need to set the profile for the system which usually includes the type of system and its GUI so for that click on the Profile option and from there click on type:

Now you will encounter three system types which include:
- Desktop: This profile installs a graphical desktop environment with common applications such as a web browser, an office suite, a media player, and more. It also enables the display manager and the network manager services. This profile is suitable for users who want a ready-to-use desktop system with minimal manual configuration.
- Minimal: This profile installs only the base system and the essential packages for a command-line interface. It does not install any graphical components or extra applications. This profile is suitable for users who want a minimal system that they can customize according to their preferences.
- Server: This profile installs a base system with some additional packages and configurations for running a server. It includes a web server, a database server, a mail server, a firewall, and other server-related tools. It also enables the SSH service for remote access. This profile is suitable for users who want to set up a server for hosting websites, databases, email, and more.
- Xorg: This profile installs the Xorg server and the basic packages for a graphical interface. It does not install any desktop environment or applications. It allows the user to choose and install their preferred desktop environment or window manager later. This profile is suitable for users who want more control over their graphical system and the applications they use.
Here I have selected the type that is Desktop, you can choose any type based on your preference:

Linux operating system offers different types of desktop environments and the most popular among them is GNOME as it is actively developed and maintained by a large and diverse community of contributors. Apart from that it offers a rich set of applications and features, such as a web browser, file manager, text editor, image viewer, music player, and more. Here, I have selected GNOME, but you can select any of the desktop environments according to your preference:

Once you have selected it now move to the next option which is graphics driver and again here you will see a number of options:

Since we are installing Arch Linux on VirtualBox, so all you need is to select the VMware/VirtualBox (open-source) and after that return to the main menu:

Now the last thing you need to do is to set the network properties and for that click on network configuration:

Now to set the configuration use NetworkManager because we are using the GNOME environment:

Now you are set and start the installation process and for that click on Install:

Now a prompt will appear and by allowing it you can change the root directory of your current running process to the Arch Linux system that you just installed. This allows you to perform some post-installation configuration tasks, such as installing a bootloader, setting up the network, creating users, and more.
You should allow this option if you want to complete the installation of Arch Linux and make it bootable and usable. Otherwise, you will have an incomplete and non-functional system:

Once the installation is complete, then execute the exit command and then shutdown the system:

Now click on the settings of Arch Linux in VirtualBox, navigate to the Storage option and then click on Arch Linux under Controller IDE, and then unmount the ISO file for Arch Linux:

Step 3: Configuring Arch Linux on VirtualBox
Next, navigate to the general settings and then set the options for the shared clipboard to bidirectional so that information copied on your primary operating system is available on Arch Linux as well:

Now launch the Arch Linux on VirtualBox and select Arch Linux, don’t worry if the screen disappears as it will auto select the option:

Once you have logged in to the system update the packages list for its default package manager and then install Arch Linux headers which contains the headers and scripts for building modules for the Linux kernel. This is necessary if you want to use some features of VirtualBox, such as bridged or host-only networking, or if you want to compile kernel modules for your installed kernel:
sudo pacman -S linux-headers

Now the option to insert Guest additions CD image while installing Arch Linux on VirtualBox is an alternative way to install the VirtualBox Guest Additions, which are drivers and applications that optimize the guest operating system for better performance and integration with the host system. This method is primarily used to activate the full screen mode and the shared clipboard option on the VirtualBox.

Now go to your file manager and click on the virtual drive and copy its contents to any other folder, as here I have moved the contents to my Documents folder:

Once the files are moved navigate to that respective directory and then allow the permission to execute the VBoxLinuxAdditions.run file.

Now run the file using the below command and wait for the installation to complete:
sudo ./VBoxLinuxAdditions.run

Now reboot the Arch Linux to apply the changes, and once the settings are applied the shared clipboard option and the full screen feature will start to work properly. So, this is how you can install Arch Linux on VirtualBox.
Cloning Arch Linux on VirtualBox
VirtualBox provides a feature of cloning, which provides the chance of creating the same copy of the virtual machine of the respective operating system. This comes in handy when the primary virtual machine is not working properly either due to any recent installation or any bugs.
In that case, you can discard the problematic one and use its copy, to create a clone on VirtualBox just click on the Clone option in the right click menu and follow the instructions:

Removing Arch Linux from VirtualBox
If you want to delete Arch Linux completely from VirtualBox just select it click on the remove from the right, click menu and then select Delete all files:

Note: While launching Arch Linux on VirtualBox you might experience that Arch Linux gets stuck for a while, so, in that case, you need to close the VirtualBox and restart it. Remember during that, do not move cursor or touch anything while Arch Linux is launching.
Conclusion
Installing different operating systems virtually on the same machine can be archived by various tools one of which is VirtualBox. Linux distribution, like Arch Linux is lightweight and requires fewer resources to operate so it can be installed virtually. The significance of that is that no separate system is required and it is the best choice for testing different applications.
To install Arch on VirtualBox just create a virtual machine in the name of Arch Linux and mount the Arch Linux ISO file on it. After that execute the archinstall command to prompt the installation process.
I’m Aaliyan javaid, an electrical engineer and a passionate tech enthusiast. I have been working with embedded systems, programming, and Linux operating systems for over 2 years. I love to explore new technologies and share my knowledge and experience with others.