How To Create Wifi to Wifi Hotspot on Xubuntu Xfce
This tutorial will help you create wifi to wifi hotspot (also known as repeater) on your Xubuntu XFCE laptop. This means receiving internet access from a wifi and giving (sharing) it away as another wifi. You will need two WLAN adapters, for example, one built-in your laptop as the transmitter and one external one as the receiver you can buy easily online. Finally, you are not required to use terminal command lines at all here. Now let’s do it.
Subscribe to UbuntuBuzz Telegram Channel to get article updates.
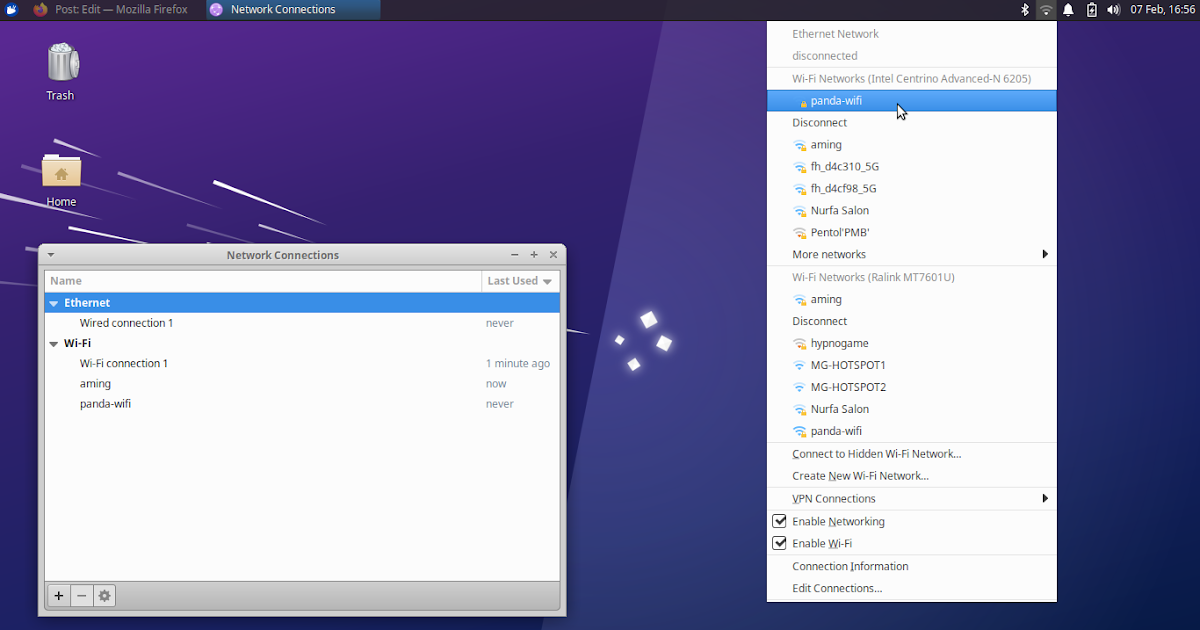
1. Click network wifi icon -> point to bottom -> Edit Connections.
2. On Edit Connections window -> click plus button (+) -> Choose connection type -> select Wifi -> Create.
3. On Editing Wi-Fi Connection window -> from the top -> change the configuration as the following:
Under Wi-Fi tab:
Connection name: Wi-fi Connection 1
SSID: panda-hotspot
Mode: Hotspot
Device: wlp3s0 or any device name which has access point ability
Under Wi-Fi Security tab:
Security: WPA & WPA2 Personal
Password: <your_password_here>
4. Save.
5. Click network wifi icon once again -> Create new wifi network -> on the window -> select configuration as the following:
Wifi Adapter: wlp3s0 or the same as Device configured above.
Connection: Wi-Fi Connection 1 or the same name as Connection name above.
Other options: greyed out.
Click Create.
This will create a new wifi hotspot network called panda-hotspot using one of the two WLAN adapters.
6. Finally, connect to an existing wifi hotspot providing internet access using the other WLAN adapter. It must be different WLAN adapter to the previous one used. With this, configuration is finished.
This will make you two different wifi networks enabled, one is panda-hotspot, and another one is the one you are connected to with internet access.
7. Now test whether panda-hotspot is available by using your phone or another laptop for example and try to connect to it and browse the internet.
Happy hacking!
****
This article is licensed under CC BY-SA 3.0.


