Hackintosh: A Comprehensive Guide to Building Your Custom macOS PC
Introduction
In the world of technology enthusiasts, few projects are as captivating as building a Hackintosh. Combining the allure of macOS with the flexibility and cost-effectiveness of custom PC building, Hackintoshing opens up a realm of possibilities for users who want the best of both worlds. This blog post will guide you through the history, benefits, challenges, and resources associated with Hackintosh, providing a detailed roadmap for those who wish to embark on this exciting journey.
What is a Hackintosh?
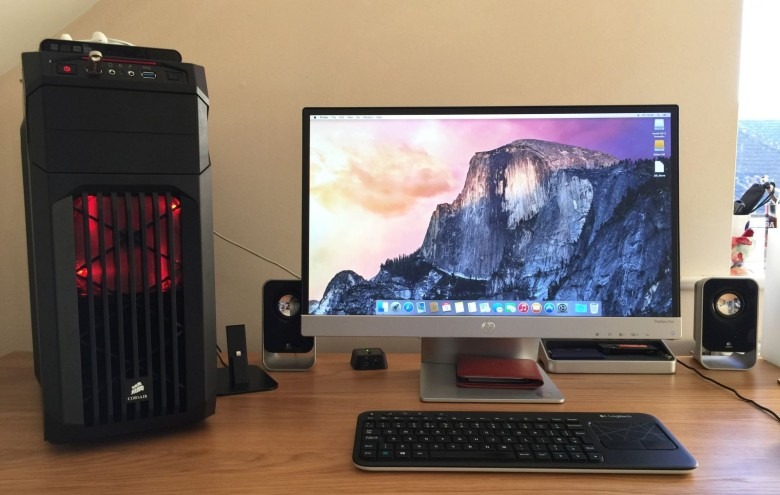
A Hackintosh is a non-Apple computer that runs macOS, the operating system exclusively developed by Apple for its Macintosh computers. The term “Hackintosh” is a portmanteau of “hack” and “Macintosh,” where “hack” refers to the modifications necessary to make macOS run on hardware not officially supported by Apple. This practice allows users to experience the macOS ecosystem without purchasing an Apple machine, often resulting in a system that is both powerful and cost-effective.
A Deep Dive into the History of Hackintosh
The roots of Hackintosh can be traced back to 2005, when Apple announced its transition from PowerPC processors to Intel’s x86 architecture. This monumental shift allowed macOS to run on the same type of processors used in most consumer PCs. This transition made it feasible, albeit with some technical challenges, to run macOS on non-Apple hardware.
Early Days and Challenges
Initially, running macOS on non-Apple hardware was a highly technical endeavor, requiring a deep understanding of both hardware and software. The first public Hackintosh installations were based on Mac OS X 10.4 Tiger. Early adopters had to patch the macOS kernel and create custom drivers, known as kexts (kernel extensions), to get the system to boot and work with the various hardware components found in a typical PC.
At this time, there were no user-friendly tools or guides, and the community was small. Enthusiasts had to manually modify the macOS installation to bypass the hardware checks that Apple had put in place. This process was time-consuming and required a good understanding of how macOS interacted with the hardware. The success rate was low, and even when it worked, it was often unstable and riddled with compatibility issues.
The Rise of Hackintosh Communities
As more tech-savvy users experimented with Hackintosh builds, online communities began to form. These communities became a hub for sharing knowledge, guides, and tools. One of the earliest and most influential communities was InsanelyMac, which provided forums and resources for users to discuss their experiences and troubleshoot problems.
The introduction of tools like Boot-132 and Chameleon made it easier to create bootable media and install macOS on a wider range of hardware. These tools simplified the process of getting macOS to recognize and utilize PC hardware, making Hackintosh more accessible to a growing number of enthusiasts.
Modern Era: OpenCore and Clover Bootloader
The Hackintosh scene has evolved significantly over the years, with the development of more sophisticated tools and bootloaders. Two of the most important modern tools are Clover and OpenCore.
- Clover: Introduced around 2012, Clover became one of the most popular bootloaders for Hackintosh builds. It offered a graphical interface for selecting different boot options and included features like UEFI support and the ability to inject kexts on the fly. Clover also made it easier to install macOS updates without breaking the system, which was a common issue with earlier Hackintosh setups.
- OpenCore: Released in 2019, OpenCore represents a new era in Hackintosh bootloaders. It is designed to be more lightweight and modular compared to Clover, offering better performance and security. OpenCore provides more fine-grained control over the boot process, allowing for greater customization and compatibility. It is considered the most advanced and reliable way to build a Hackintosh today.
Benefits of Building a Hackintosh
Creating a Hackintosh comes with several benefits that make it an appealing project for technology enthusiasts and professionals alike.
1. Cost-Effectiveness
One of the most significant advantages of building a Hackintosh is the potential cost savings. Apple products are known for their premium pricing, which often includes a markup for the brand and design. By building a Hackintosh, you can select each component individually, often resulting in a system that offers comparable or superior performance to a similarly priced Mac.
For example, if you need a high-performance machine for video editing or software development, a Mac Pro can cost thousands of dollars. With a Hackintosh, you can build a system with equivalent specifications at a fraction of the cost. This cost-effectiveness is particularly appealing to students, freelancers, and small businesses that require powerful computing on a budget.
2. Hardware Customization and Upgradability
Apple computers are known for their elegant design and build quality, but they often lack the flexibility and upgradability that many PC enthusiasts crave. When you build a Hackintosh, you have the freedom to choose your hardware components, including the CPU, GPU, motherboard, RAM, and storage. This level of customization allows you to tailor the system to your specific needs, whether you’re building a workstation for 3D rendering or a gaming rig.
Moreover, Hackintoshes offer the advantage of upgradability. Unlike many Apple computers, which are often designed with limited upgrade options, a Hackintosh allows you to swap out components as technology advances. This means you can keep your system up-to-date with the latest hardware without having to purchase an entirely new machine.
3. Learning Experience and Technical Knowledge
Building a Hackintosh is not just about getting a cheaper or more customizable macOS machine; it’s also an educational experience. The process involves understanding the intricacies of computer hardware, the macOS operating system, and how they interact. You’ll learn about UEFI vs. BIOS, bootloaders, kexts, and the macOS boot process.
For many, this learning experience is one of the most rewarding aspects of building a Hackintosh. It provides a deep dive into the inner workings of both hardware and software, enhancing your technical skills and knowledge. Whether you’re an IT professional, a computer science student, or simply a tech enthusiast, building a Hackintosh can be a valuable hands-on project.
4. Performance and Optimization
With a Hackintosh, you have the ability to build a high-performance machine optimized for your specific workflow. By carefully selecting compatible hardware, you can create a system that rivals or even surpasses the performance of a Mac in certain tasks. This is particularly useful for power users who require a lot of processing power, such as video editors, graphic designers, and software developers.
For instance, you can choose a high-end graphics card, a multi-core processor, and fast SSDs to build a workstation capable of handling intensive tasks like 4K video editing, 3D rendering, or machine learning. Additionally, you can configure your Hackintosh to dual-boot macOS and Windows, giving you the flexibility to use both operating systems on the same machine.
Challenges and Legal Considerations
While the benefits of building a Hackintosh are compelling, there are also significant challenges and legal considerations to be aware of.
1. Compatibility and Stability Issues
One of the most common challenges in building a Hackintosh is hardware compatibility. macOS is designed to work with a limited range of hardware configurations found in Apple’s official product line. When you build a Hackintosh, you’re using hardware that may not be officially supported by macOS, which can lead to compatibility issues.
Common issues include:
- Graphics Card Support: Not all graphics cards are natively supported by macOS. NVIDIA GPUs, in particular, have limited support in recent versions of macOS. AMD GPUs tend to have better compatibility.
- Wi-Fi and Bluetooth: Many PC Wi-Fi and Bluetooth adapters are not supported by macOS, requiring the use of compatible hardware or additional drivers.
- Audio and Networking: Getting onboard audio and Ethernet to work can sometimes be tricky, depending on the motherboard’s chipset.
Stability can also be an issue. Official macOS updates may introduce changes that break compatibility with your Hackintosh. This means you may need to wait for the community to develop patches or new versions of tools like OpenCore or Clover before updating your system.
2. The Legal Gray Area
Running macOS on non-Apple hardware is a violation of Apple’s End User License Agreement (EULA). According to the EULA, macOS is licensed to be used only on Apple-branded hardware. This means that while building a Hackintosh is not illegal in the traditional sense, it does breach Apple’s software license terms.
Apple has not pursued legal action against individual Hackintosh users, likely because the practice remains a niche hobbyist activity that doesn’t significantly impact Apple’s bottom line. However, it’s important to be aware that Hackintoshing exists in a legal gray area, and using macOS on non-Apple hardware is not officially sanctioned by Apple.
3. Software Updates and Maintenance
Keeping a Hackintosh up-to-date can be a challenging process. While Apple makes updating macOS on official hardware a seamless experience, the same is not true for Hackintoshes. Each macOS update has the potential to break your Hackintosh, requiring careful preparation and sometimes complex troubleshooting to get everything working again.
Before applying any system updates, it’s recommended to:
- Backup your system using Time Machine or a disk cloning tool.
- Check community forums like tonymacx86 or r/Hackintosh for reports on the latest updates.
- Ensure you have the latest version of your bootloader and any necessary patches.
In some cases, you may need to wait for the Hackintosh community to develop and release updated kexts or bootloader versions compatible with the new macOS version.
Getting Started with Hackintosh: Essential Resources
If you’re ready to take on the challenge of building a Hackintosh, you’ll find a wealth of resources and tools to guide you through the process. Here are some of the most valuable resources available to the Hackintosh community:
1. tonymacx86
tonymacx86 is one of the most popular and comprehensive resources for Hackintosh enthusiasts. It offers a wide range of guides, tools, and a highly active forum where users can share their experiences and seek help.
- UniBeast and MultiBeast: These are two essential tools developed by tonymacx86 to simplify the Hackintosh installation process. UniBeast helps you create a bootable macOS USB installer, while MultiBeast provides post-installation tools to configure drivers and bootloaders.
- Buyer’s Guide: tonymacx86 regularly updates its Hackintosh Buyer’s Guide, recommending compatible hardware for different types of builds, from budget-friendly systems to high-end workstations.
- Forum: The tonymacx86 forum is a valuable resource for troubleshooting and community support. Users share their build experiences, solutions to common problems, and updates on the latest developments in the Hackintosh world.
- tonymacx86
2. Dortania
Dortania is a project focused on providing in-depth guides for building a Hackintosh using OpenCore, the latest and most advanced bootloader for Hackintosh systems. The guides on Dortania are highly detailed and cater to both beginners and experienced users.
- OpenCore Install Guide: This comprehensive guide walks you through the entire process of building a Hackintosh using OpenCore. It covers everything from selecting compatible hardware to creating the macOS installer and configuring OpenCore.
- Post-Installation Guides: Dortania also offers post-installation guides to help you fine-tune your Hackintosh for optimal performance and stability. This includes setting up audio, networking, and GPU acceleration.
- Dortania
3. r/Hackintosh (Reddit)
The Hackintosh subreddit is a vibrant community where users share their builds, discuss compatibility issues, and provide support to one another. It’s a great place to stay up-to-date with the latest developments in the Hackintosh world and to seek advice from experienced users.
- Build Logs: Many users post detailed build logs on r/Hackintosh, outlining the hardware they used, the installation process, and any challenges they encountered. These logs can be an invaluable resource for those looking to build a similar system.
- Troubleshooting and Support: If you run into issues with your Hackintosh, the r/Hackintosh community is often quick to help. Whether you’re dealing with kernel panics, boot issues, or hardware compatibility problems, you can find support here.
- r/Hackintosh
4. InsanelyMac
InsanelyMac is one of the oldest and most comprehensive Hackintosh communities on the internet. It offers forums, guides, and a vast repository of tools and resources for Hackintosh builders.
- Forum: The InsanelyMac forum is a treasure trove of information. It covers a wide range of topics, including installation guides, hardware compatibility lists, and troubleshooting tips. The community is diverse and includes both beginners and advanced users.
- Downloads: InsanelyMac provides a download section where you can find various tools, kexts, and utilities to assist with your Hackintosh build.
- InsanelyMac
Step-by-Step Guide to Building a Hackintosh
Now that we’ve covered the background and resources, let’s go through a basic overview of the steps involved in building a Hackintosh.
1. Planning and Selecting Hardware
The first step in building a Hackintosh is selecting compatible hardware. The success of your build depends largely on choosing components that are known to work well with macOS.
- CPU: Intel processors are generally more compatible with macOS than AMD processors, although recent developments have made AMD builds possible with additional patches.
- Motherboard: Choose a motherboard with a chipset known to work well with macOS, such as Intel Z370, Z390, or Z490. Gigabyte motherboards are often recommended due to their compatibility.
- Graphics Card: For the best compatibility, choose an AMD Radeon GPU, as macOS provides native support for many Radeon models. NVIDIA GPUs are not recommended for recent versions of macOS due to the lack of driver support.
- Storage: Use an SSD for faster boot times and overall performance. NVMe SSDs are supported but may require additional configuration.
2. Creating a Bootable macOS Installer
Once you’ve selected your hardware, the next step is to create a bootable USB installer for macOS.
- Download macOS: Use a Mac or an existing Hackintosh to download the macOS installer from the App Store.
- Create Bootable USB: Use a tool like UniBeast (for Clover) or follow the Dortania OpenCore guide to create a bootable USB installer. This process involves formatting the USB drive and copying the macOS installer to it, along with the necessary bootloader files.
3. Configuring the BIOS
Before installing macOS, you’ll need to configure your motherboard’s BIOS settings. This includes:
- Setting the boot mode to UEFI.
- Disabling Secure Boot and Fast Boot.
- Enabling AHCI mode for SATA.
- Configuring the integrated graphics settings if using onboard graphics.
4. Installing macOS
With the bootable USB installer prepared and the BIOS configured, you can begin the macOS installation process.
- Boot from USB: Insert the USB installer and boot from it. Use the bootloader (Clover or OpenCore) to start the macOS installer.
- Install macOS: Follow the on-screen instructions to install macOS. This process is similar to installing macOS on an official Apple device.
- Post-Installation: Once macOS is installed, you’ll need to perform post-installation tasks, such as configuring drivers and setting up the bootloader on the system’s hard drive.
5. Post-Installation Tweaks and Optimization
After installing macOS, you’ll need to perform some post-installation tweaks to ensure your Hackintosh runs smoothly.
- Install Kexts: Use tools like MultiBeast or OpenCore Configurator to install the necessary kexts for audio, networking, and other hardware components.
- Configure Bootloader: Set up the bootloader to load macOS from the system’s drive without needing the USB installer.
- Fine-Tuning: Make adjustments for power management, GPU acceleration, and other system optimizations.
Conclusion
Building a Hackintosh is a rewarding endeavor that offers the opportunity to run macOS on custom hardware tailored to your needs. It provides significant cost savings, hardware flexibility, and a deep learning experience. However, it also comes with challenges, including hardware compatibility, legal considerations, and the need for ongoing maintenance.
By utilizing the wealth of resources available within the Hackintosh community, including guides from tonymacx86, Dortania, and forums like InsanelyMac and r/Hackintosh, you can navigate these challenges and build a system that offers a unique blend of power, customization, and the macOS experience. Whether you’re a seasoned tech enthusiast or a curious beginner, the journey into Hackintoshing is one that can deepen your understanding of both hardware and software, providing a satisfying and educational project.