Increase or Decrease Video Playback Speed in VLC
Have you ever watched a video and wished you could slow it down or speed it up? Maybe the speaker is too fast, or you just want to skip through some parts. You can do that with VLC media player!
In this article, we’ll explore how to control video playback speed using VLC.
Increase or decrease speed with keyboard
Not a fan of mouse clicks? VLC provides some simple keyboard shortcuts to control the speed of the playback.
When you are playing a video, use the following keys, for the mentioned purposes.
| Function | Key |
|---|---|
| Increase playback speed | + |
| Increase playback speed fine control | ] |
| Decrease playback speed | – |
| Decrease playback speed fine control | [ |
| Make playback speed back to normal | = |
Fine control means increasing/decreasing the speed only at a small fraction.
While playing a video, click on the Playback option on the top menu bar. When hovering over the speed entry, you will get some preset speed options.
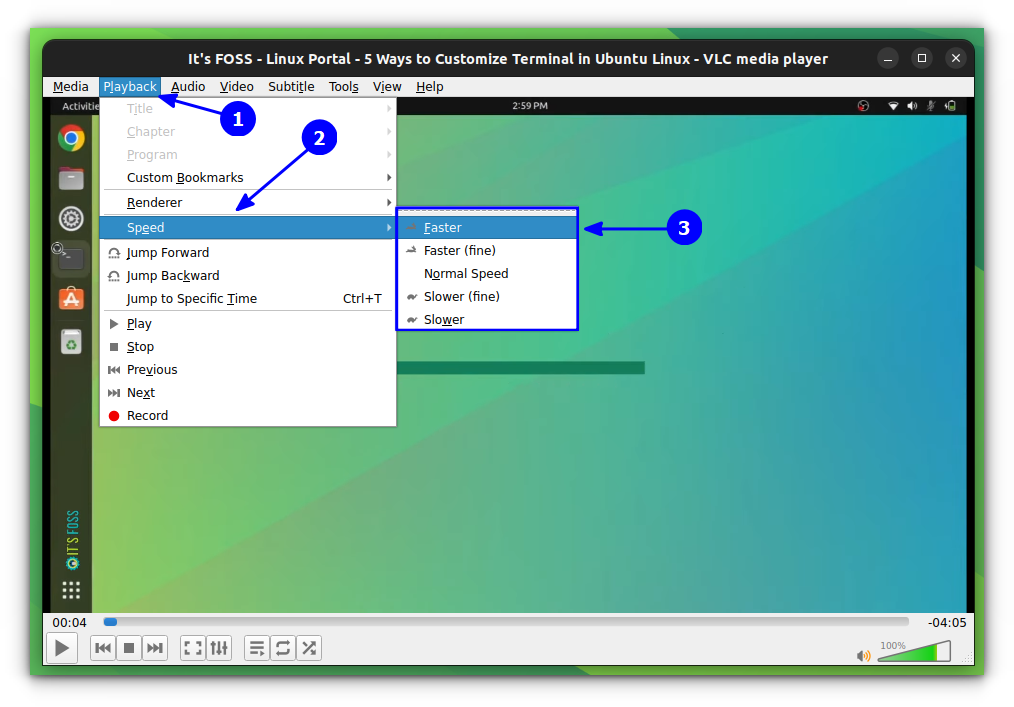
You can use the option multiple times to increase and decrease the speed. Anytime, select Normal Speed to come back to the normal video speed, that is 1.0x.
Speed up a video using right-click
This is almost the same as the above one, except you won’t be clicking on the menubar anymore.
While playing a video, right-click on the play area. From the resulting context menu, select Playback → Speed. From the resulting options, select the speed you want.
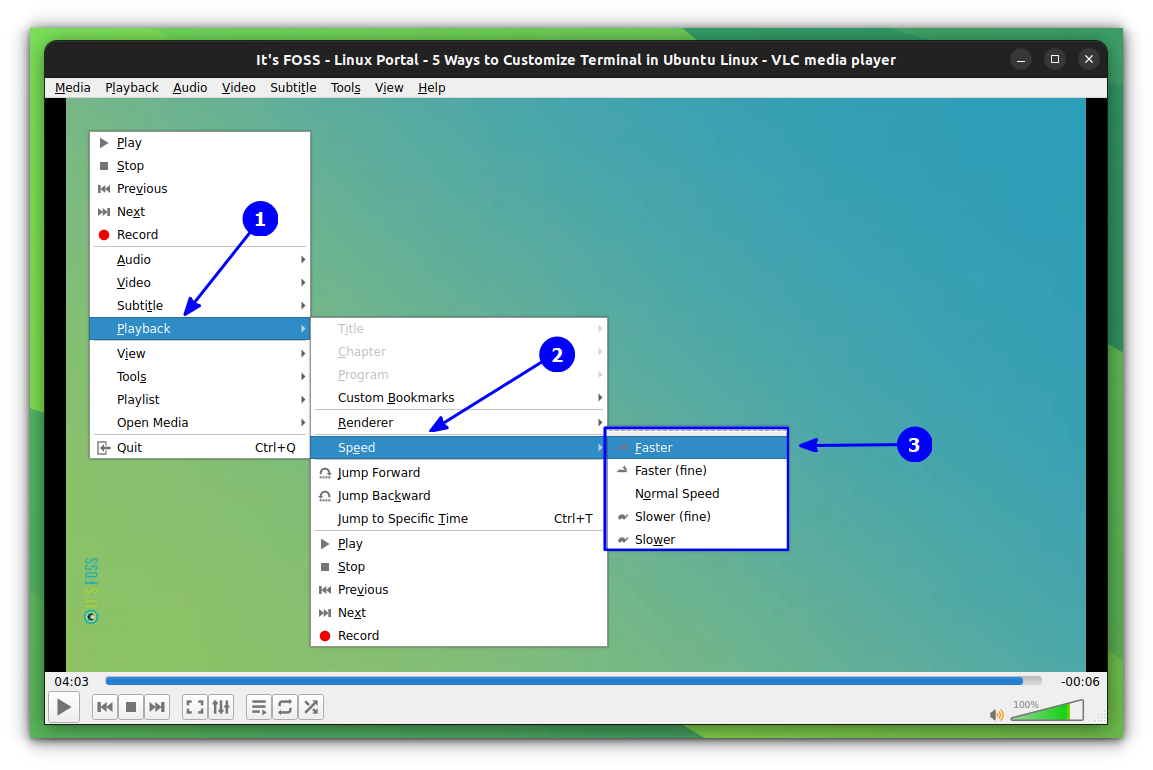
You can repeat the process to get more/less speed.
Control the speed using the status bar
In VLC, you can enable a small status bar below the control icons. For that, first click on View in the top menu bar. From there, enable the Status bar, by checking the box.
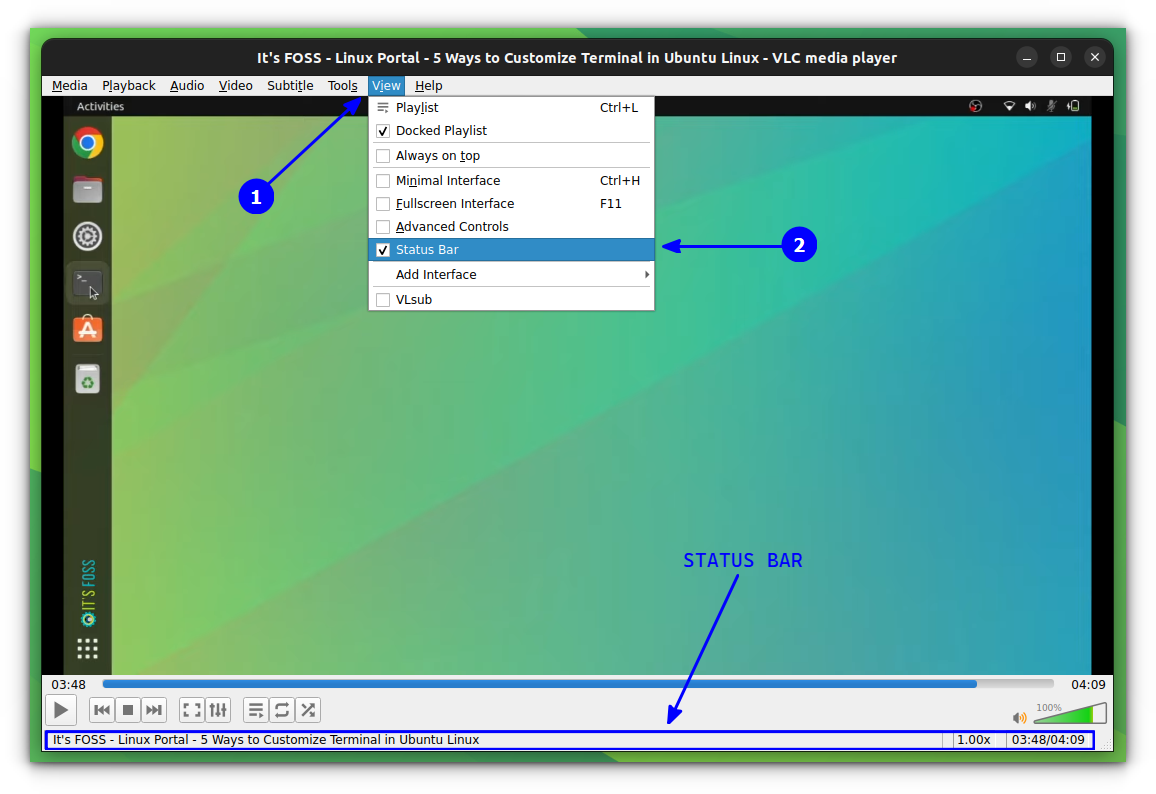
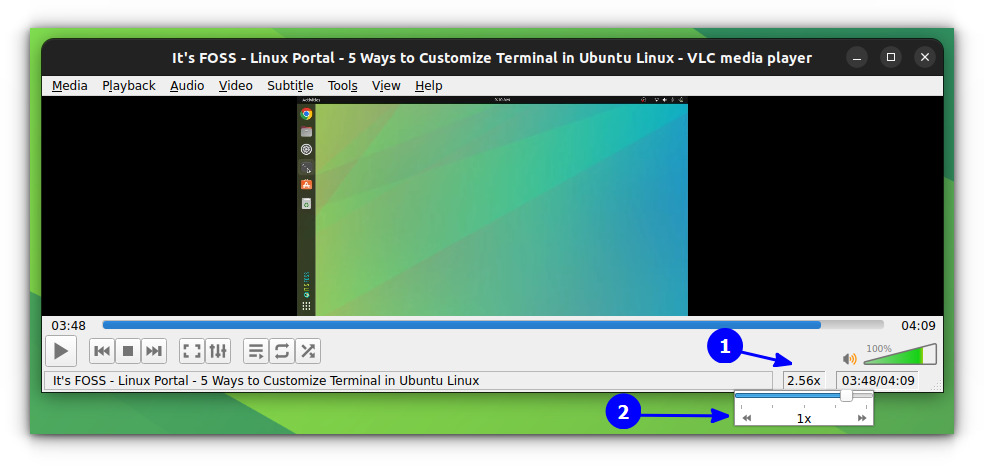
Now, on the status bar, you can see a small field on the right side, that indicates the current playback speed. Click on it to get a slider.
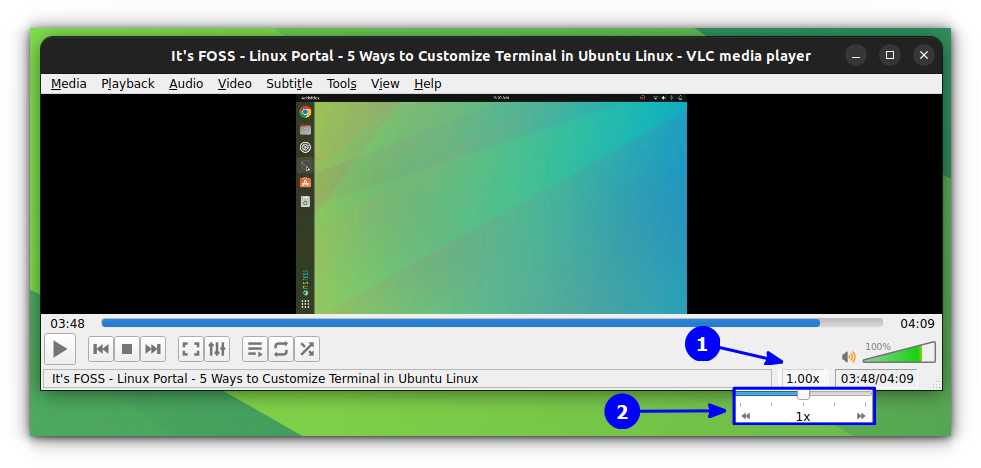
Scroll this slider to the right to increase the speed, and scroll left to decrease the speed. Use the forward and backward button to do it in steps.
I hope you liked this quick little VLC tip.
