How to Install Samba in Debian Bookworm – LinuxWays
Debian Bookworm, also known as the universal operating system, is used to develop software, edit documents, route emails, etc. We can use Debian to install Samba and enhance many features such as file sharing, browsing, authentication, authorization, etc.
The complete procedure for installing samba in Debian bookworm is described in this write-up.
What is Samba?
According to the official documentation of Samba, it is a Linux tool used to share directories from Linux servers to different operating systems. The two main protocols like Server Message Block (SMB) and Common Internet File System (CIFS) protocols are used by Samba. Samba offers flexibility with respect to setup, configuration, etc.
How to Install Samba in Debian Bookworm?
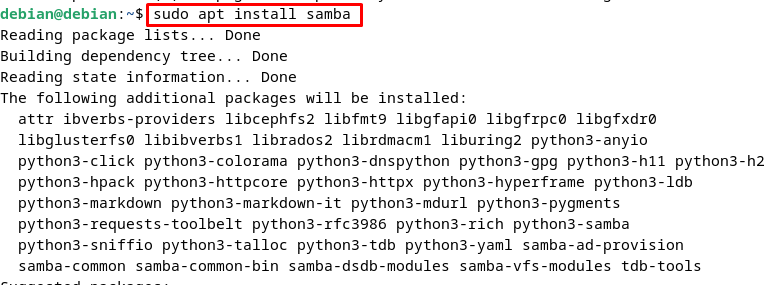
Installing samba in Debian Bookworm is a straightforward process. Open up the Debian terminal and execute the following command:
As we can see Debian is asking for permission because installing Samba in Debian is going to take an additional 92.0 MB of space. Click on “Y” to continue the installation process as shown below:
![]()
Debian is downloading the Samba package for us as shown in the screenshot below:

After a few minutes, samba would be installed successfully as indicated below:

To confirm the installation, execute the following command:

Hence we can see that Samba is running successfully as shown in the snapshot below:

How to Configure Samba in Debian Bookworm?
Samba configuration settings can be displayed by executing the following command:
$ sudo nano/etc/samba/smb.conf

After the command has been executed successfully, the file will look like this:

The above screenshot shows some basic settings like workgroup and interfaces.
workgroup describes the Operating System we are connected to. If we want to connect with different groups we can change it accordingly. Interfaces demonstrate which IP addresses are connected to our Samba network. Hence, these settings tell us that Samba is secure and only the user can allow which devices are to be connected with Samba.
To generate our user, we first need to enter a name. You can choose your own name. We are going with “my new share”.
Now set the path as shown below:
Set the browseable to yes in order to browse it with the share as seen below:
Now we can set the things either to be readable only or to be editable too as follows:
We can either set a password in order to avoid any anonymous user or we simply cannot provide a password as listed below:
Now allow the valid user who can access it. In our case, it’s Ahsaan as shown below:

To save the configuration file press “CTRL + S”, then press “CTRL + X”, type “Y” and press “ENTER”. Now we have to follow a few steps to complete our configuration as listed below:
How to Restart Samba?
Now restart Samba with the help of the following command:
$ sudo systemctl restart smbd
How to Verify Samba Configuration?
Run the command shown below, to verify the samba configuration:
The result looks something like this:

The above snippet shows that everything is working perfectly fine.
How to Set Up a Samba User?
We need to set up a Samba user in order to connect with our “new share”.The command for setting up a new user is given below:
You can use any name of your choice instead of “Ahsaan”.

How to Connect With Share?
To connect with a share, we need to install some packages. Use the following command:
$ sudo apt install samba-client cifs-utils
The above command returns the following output as shown below:

Debian asks for permission because an extra 2513 kB of disk space is required. Press “Y” to continue.

After pressing “Y”, it may take a few minutes depending upon your PC and internet connection and the required packages will be installed successfully.
Now to open our Debian files, we will go to our Debian PC, and click on the “Files” icon as shown below:

In the snapshot below we can see the “Other Locations” option. Click on it:

Now navigate to the “Networks” and select “Debian” as shown below:

We can see the “new_share” folder.

Thus, now we can grant permission for file access from any Linux/Debian Machine to a new user if the user is a member of a similar LAN.
How to Uninstall Samba in Debian
To uninstall Samba in Debian Bookworm, simply execute the following command:
After executing this command, Samba would be uninstalled from Debian successfully.

The terminal asks for permission. Pressing “Y” will confirm the uninstallation of Samba from your system.
Conclusion
To install samba in Debian Bookworm, simply open the Debian terminal and execute the “sudo apt install samba” command. To confirm the installation, execute the “systemctl status smbd” command. Furthermore, we can configure samba in Debian bookworm using “sudo nano/etc/samba/smb.conf”. Then to verify the configuration setup use the “sudo testparm” command. To connect with a share, we can use the “sudo apt install samba-client cifs-utils” command. This article has illustrated how to install and configure Samba in Debian Bookworm.
