How To Configure Tor Socks Proxy on Debian 12 and Ubuntu 22.04
This tutorial will help you setup The Onion Router (TOR) anonymity software on your computer system with Debian 12 or Ubuntu 22.04 for use as a proxy with browser and any other internet-based applications you want. Please note that Tor works using address “localhost” and port number “9050”. Enjoy!
Subscribe to UbuntuBuzz Telegram Channel to get article updates.
To enable Tor proxy on Debian 12 and and enable application such as Firefox browser or command lines to connect to the internet via Tor.
First thing to do is to login as root and install two tools required for this setup.
$ sudo -i
# apt-get install wget apt-transport-https
Use your text editor (we use nano) to create and edit /etc/apt/sources.list/tor.list text file with the following 2 lines content:
For Debian 12 Bookworm:
deb     [signed-by=/usr/share/keyrings/tor-archive-keyring.gpg] https://deb.torproject.org/torproject.org bookworm main
deb-src [signed-by=/usr/share/keyrings/tor-archive-keyring.gpg] https://deb.torproject.org/torproject.org bookworm main
For Ubuntu 22.04 Jammy Jellyfish:
deb     [signed-by=/usr/share/keyrings/tor-archive-keyring.gpg] https://deb.torproject.org/torproject.org jammy main
deb-src [signed-by=/usr/share/keyrings/tor-archive-keyring.gpg] https://deb.torproject.org/torproject.org jammy main
If you are not sure what is your OS version’s codename, check it up with lsb_release -c command line.
Once Tor Debian repository is set, you can install Tor software package using three of command lines below. Please remember that here we use GNU wget to get a GnuPG identity to make sure packages downloaded are authentic from The Tor Project.
# wget -qO- https://deb.torproject.org/torproject.org/A3C4F0F979CAA22CDBA8F512EE8CBC9E886DDD89.asc | gpg --dearmor | tee /usr/share/keyrings/tor-archive-keyring.gpg >/dev/null
# apt update
# apt install tor deb.torproject.org-keyring
Make sure tor service is enabled and running using your Terminal. Don’t forget to exit from administrator account.
# systemctl enable --now tor
# systemctl status tor
# exit
Configure your proxy settings via System Settings under SOCKS option.
- Run Settings.
- Open Network section.
- Click Proxy “gear” button.
- Network Proxy dialog will appear and fill in:
- Socks host: localhost
- Port number: 9050
- Close
You can confirm if you are connected to the internet via Tor proxy by various methods.
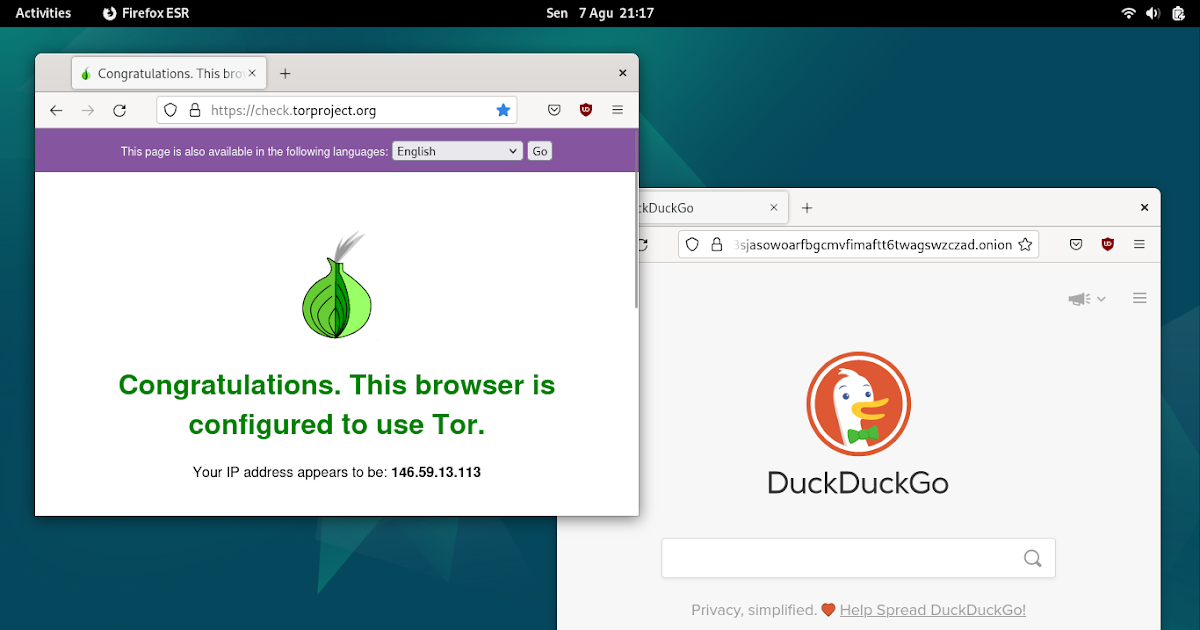
From your web browser (we use Firefox) you can go to: check.torproject.org and you should see the page says “Congratulations!” instead of “Sorry”. See picture below.
From your browser too, now you should be able to visit any .onion website (known also as the Dark Web) such as the onion version of Duckduckgo Search Engine. Please note that a proper onion address is now consisted of 56 character length (also known as V3).
From your Terminal, you can utilize curl command line below to confirm your connection via Tor proxy successful. Thank you ki9 from StackExchange for making this command line.
$ curl --socks5 localhost:9050 --socks5-hostname localhost:9050 -s https://check.torproject.org/ | cat | grep -m 1 Congratulations | xargs
This is the goal of our configuration. If you reached this, you finished the configuration successfully.
To disable Tor proxy, in general it is equal to simply disable SOCKS proxy utilization in the System Settings.
- Run Settings.
- Open Network section.
- Click Proxy “gear” button.
- Select Disabled.
- Close.
Finally, if you want to remove Tor software from your system, that’s basically reverting back everything we did above by command lines below.
$ sudo apt remove tor deb.torproject.org-keyring
$ sudo rm /etc/apt/sources.list/tor.list
$ sudo apt update
****
How to check if Tor is working and debug the problem on CLI?
This article is licensed under CC BY-SA 3.0.


