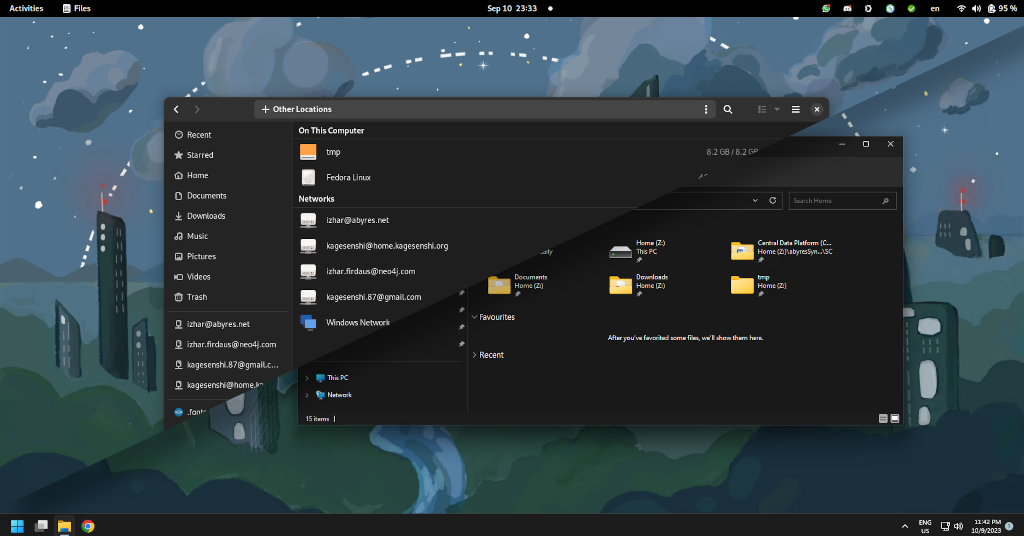
Creating “Reverse WSL” For Running Windows Application On Linux Host
State of the linux desktop in 2023
Linux today have matured to the point where majority of activities commonly done by computer users can be achieved easily, especially considering most people are primarily using the computer to access internet applications. Even when it comes to gaming, thanks to Steam’s effort in Proton and Steam Deck, Linux is now a pretty viable platform for those who who are not playing competitive games.
People I know have experimented with making purely non-technical people to use Linux without them knowing, with good success rate, while I myself have experimented with forcing my department staff to use Linux as their primary operating system with good success, to the point of the staff noticed that Windows is a pretty difficult platform to work with for modern day developers.
Libreoffice also is fully capable to do all common office tasks without issues, and with some training to leverage the features available in Libreoffice, the team also discovered how frustrating it can be when working with Microsoft Office especially when trying to structurally automate formatting. A simple tool you know how to use well is a magnitude better than a fancy tool that you only know how to use its basic feature. Libreoffice also opens Microsoft Office documents well with minimal issues, except for the usual missing fonts messing with documents a bit, which easily fixed by installing the fonts.
However, in Malaysia, Microsoft Office dominance can be an annoying problem when working with clients that primarily uses Microsoft’s stack and refuses to accept or work with PDF. Microsoft Office also almost always open ODF poorly with regular corruption, while DOCX files saved by Libreoffice seems to almost always opened poorly by Microsoft Office.
Windows Subsystem For Linux (WSL)
The frustration regularly faced by developers when working on Windows, and the dominance of Open Source in software development ecosystem to a degree threathened Windows, where developers preferring MacOS for their preferred desktop. In response to that , for a few years now, Windows introduced the ability to run Linux commandline seamlessly on Windows through their WSL feature which essentially runs a Linux VM on top of Windows, with seamless filesystem integration to allow access of files in the host by the guest VM. This to a degree allows developers to have access to their Linux tooling on Windows, alongside access to Microsoft Office.
Reverse WSL With QEMU, Libvirt & VirtIO
For those who primarily use Linux as their daily driver and dealing with clients who are locked into Microsoft ecosystem (even rejecting Google Docs), the lack of Microsoft Office on Linux sometimes forces people to switch to Windows in order to get work done, which usually means a troublesome dual computer operation.
However little is known to the most that Linux virtualization have also improved significantly over the past several years, where it is now possible to create a “Reverse WSL” that allows you access to Microsoft Office on your Linux desktop, complete with clipboard sharing and filesystem sharing, with near-native performance using QEMU KVM virtualization. Effectively allowing you to keep using Linux as your primary operating system, while still getting access to Microsoft Office without having to dual-boot or lugging two computers around.
This guide will help you set up your computer with a highly fine tuned VM of Windows 11, alongside customizations needed to make integration seamless between the two operating systems, so that you can get benefits of both worlds on a single unified dual operating system experience.
System Requirements
This guide assumes that you have at least 4c/8t CPU with 16GB of RAM, and you are using Fedora as the primary operating system. Any other Linux distro should work too, but this guide focuses on Fedora.
You will also need Windows 10 Pro or Windows 11 Pro as RDP would be a key component for this, which is only available on the Pro edition of Windows.
Setting Up The VM
You will need to install and use QEMU and Libvirt for your virtualization, as VirtIO comes with it.
$ dnf install virt-manager libvirt-daemon-kvm -y
For near-native performance, we will be using VritIO to improve both disks, network and graphics I/O, which means, the VM creation process would be slightly different.
The first step is to start up Virt Manager, and before starting with installation, you will need to enable XML editing at Edit > Preferences
Then, create a new VM with at least 2 cores, and 8GB of RAM (you can enable ballooning later). Make sure that you check “Customize configuration before install” option at the final step of VM creation.
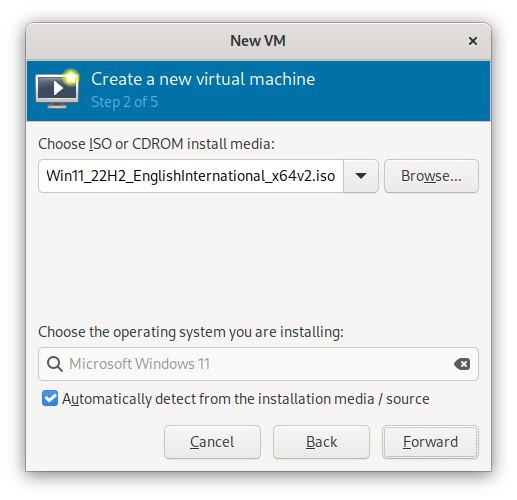
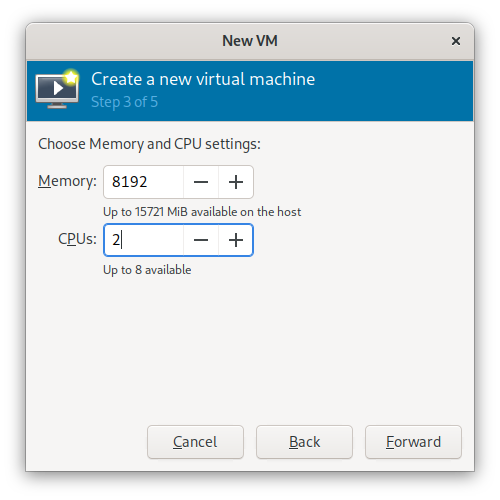
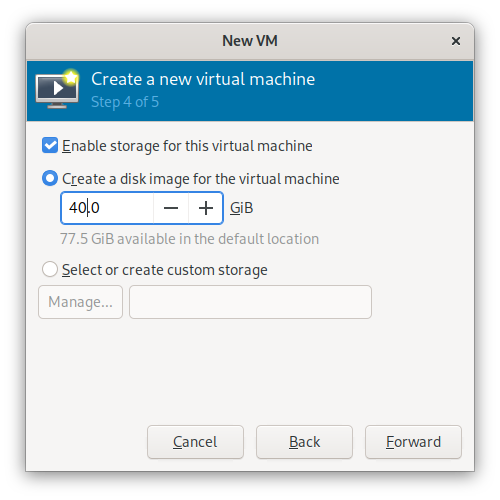
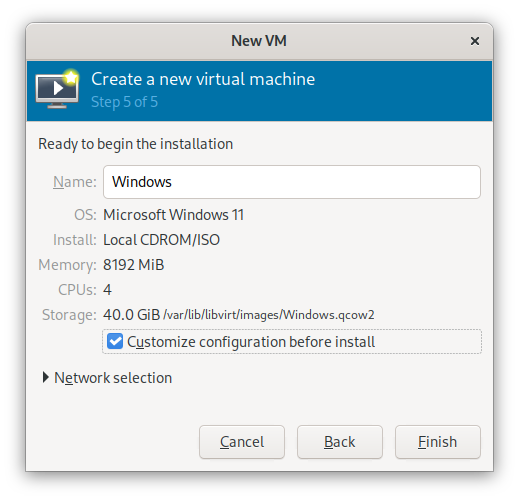
At the customization page, you will need to configure the following:
- CPU Pinning
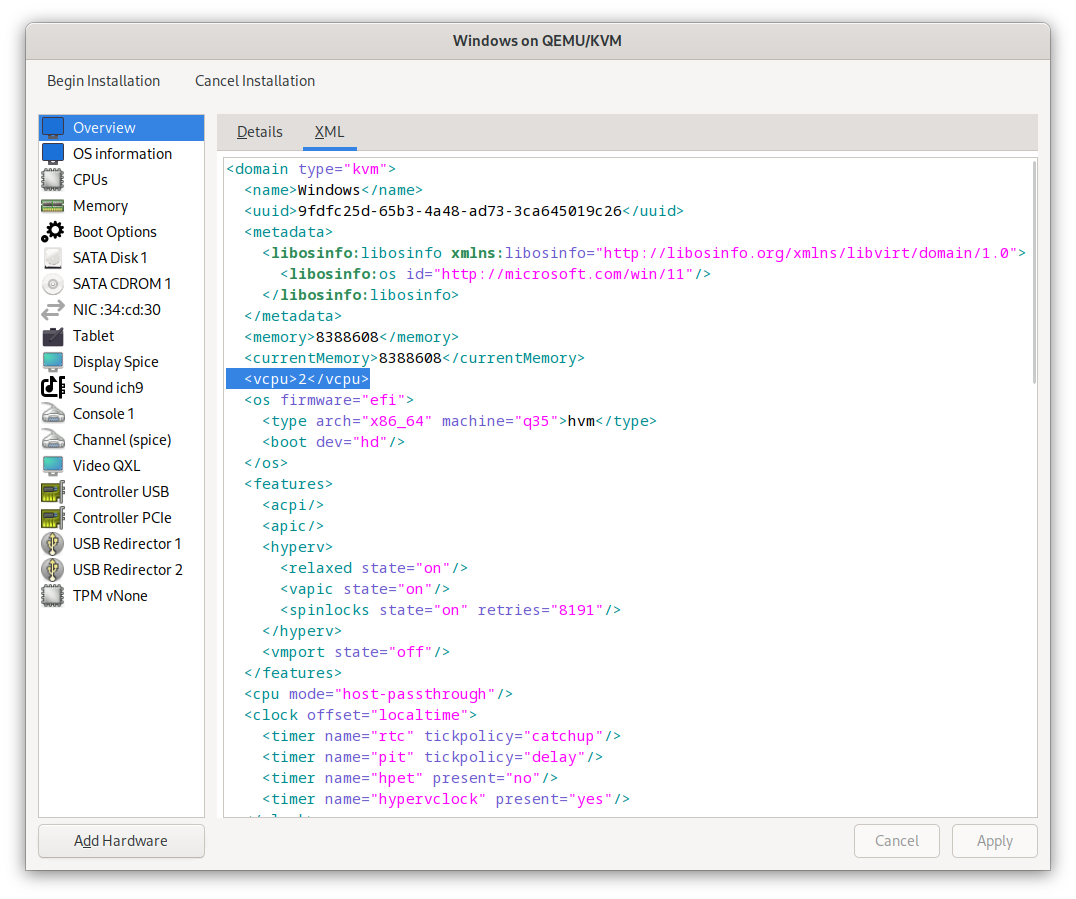
Replace <vcpu>2<vcpu> with:
  <vcpu placement="static" cpuset="3,5">2</vcpu>
  <cputune>
    <vcpupin vcpu="0" cpuset="3"/>
    <vcpupin vcpu="1" cpuset="5"/>
  </cputune>
This will pin the 2 CPU to physical core 1 (second core) and core 2 (third core) of the base host, minimizing competition with the main operating system running at core 0 (first core).
- Change default disk to VirtIO bus
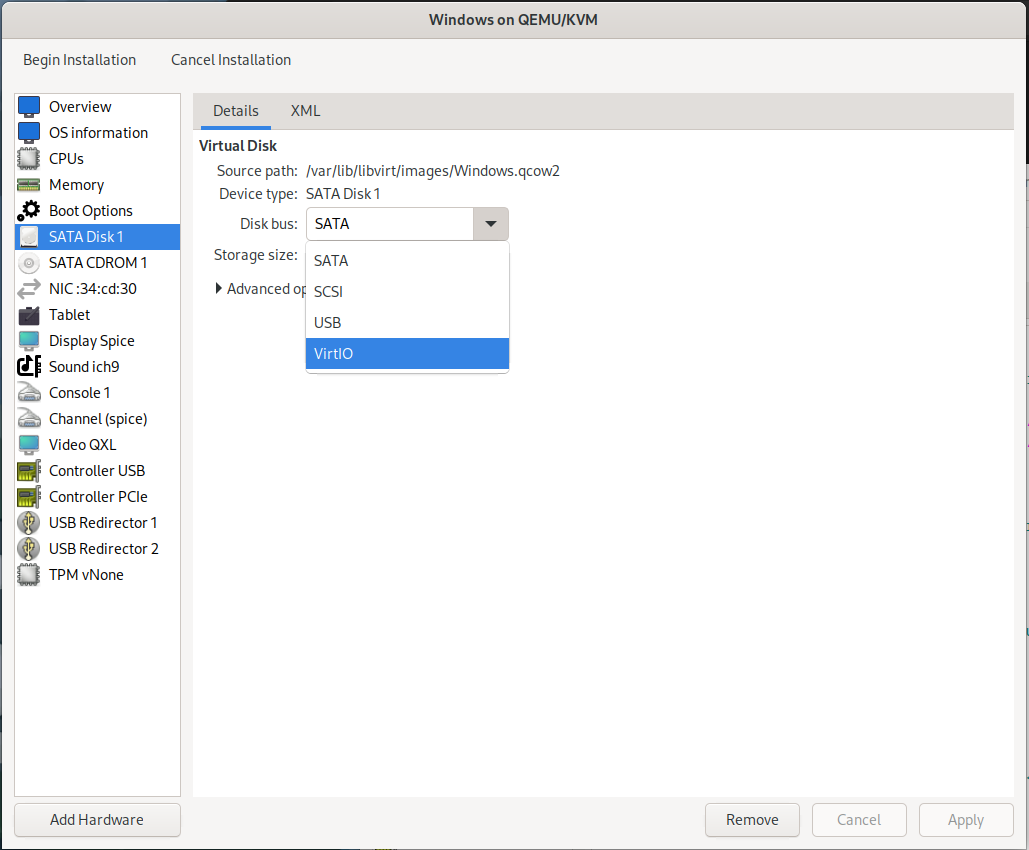
- Set VirtIO Video
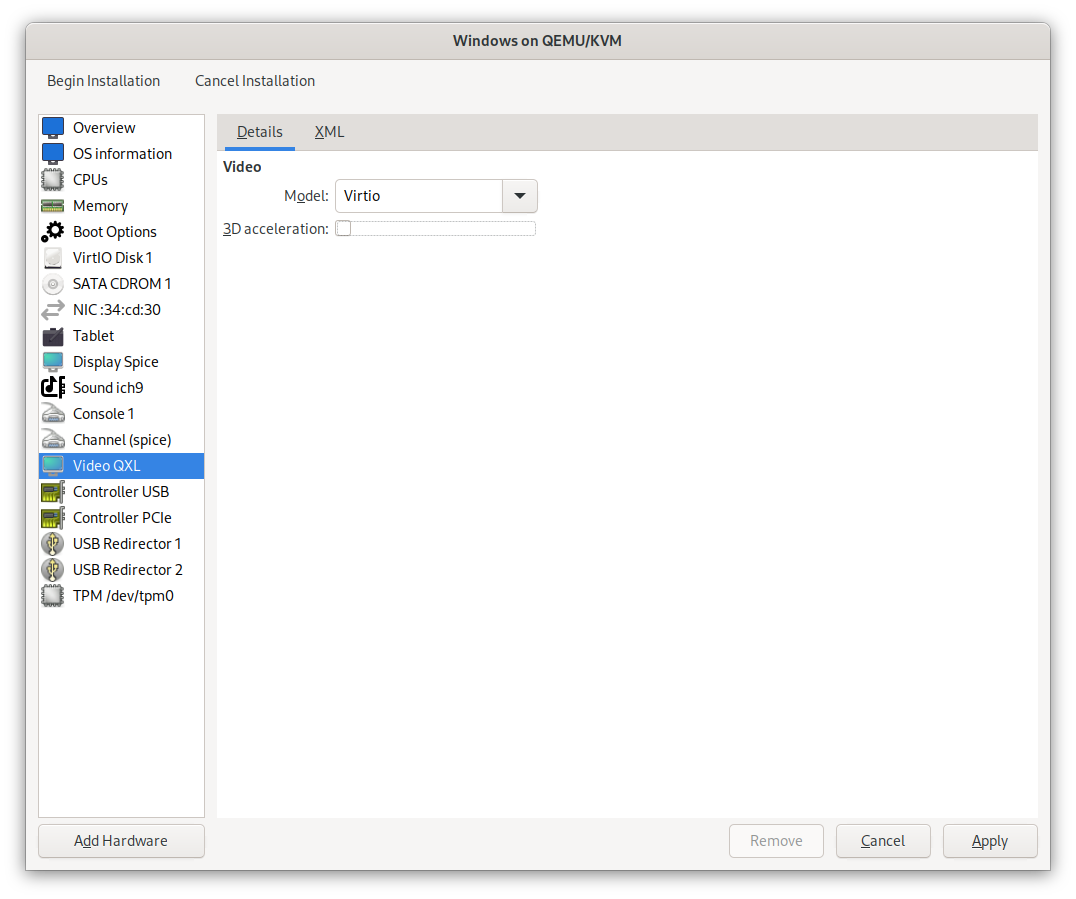
Disable 3D accelleration for now. You can enable it later after drivers are loaded and RDP is operational.
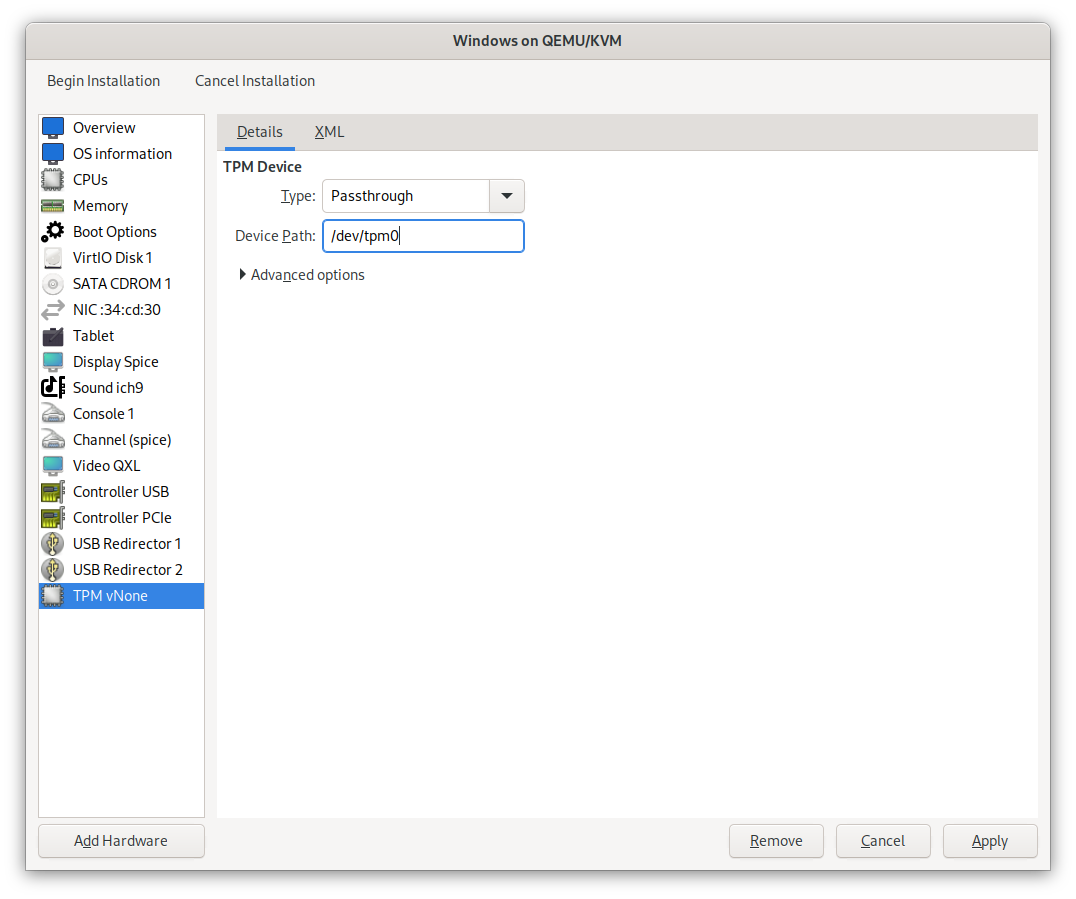
- (Optional) If you will only have 1 windows VM, you may want to use TPM passthrough.
- Add VirtIO driver ISO image as another SATA CDROM. You will need it to load VirtIO driver
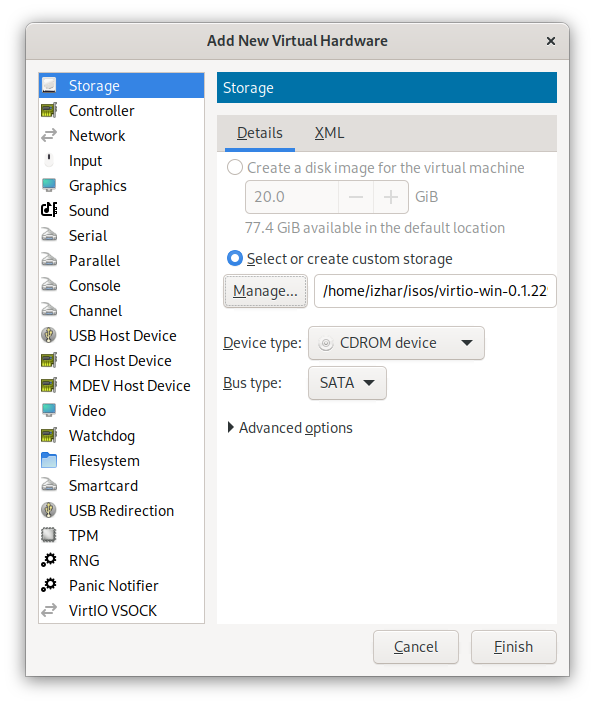
You can get VirtIO driver ISO image from Fedora here: https://fedorapeople.org/groups/virt/virtio-win/direct-downloads/stable-virtio/virtio-win.iso
- Configure HyperV optimization.
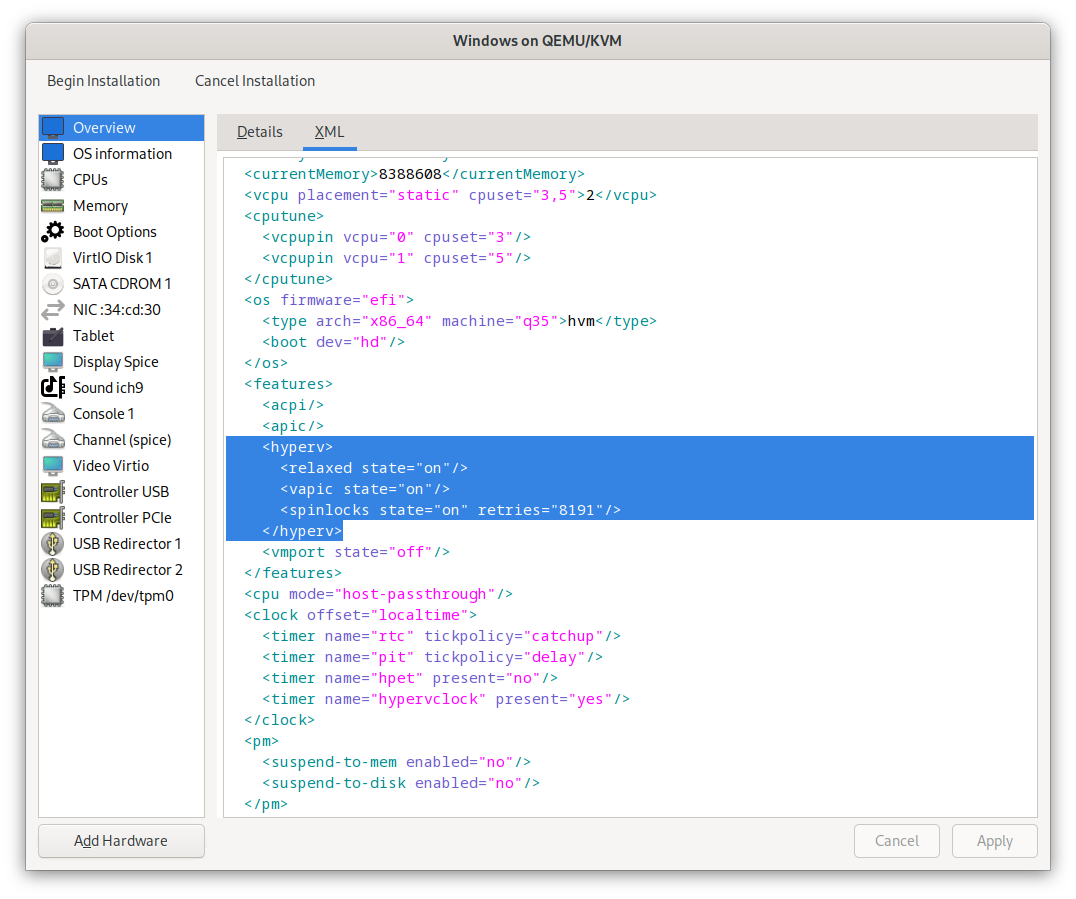
Set the configuration to:
    <hyperv mode="custom">
      <relaxed state="on"/>
      <vapic state="on"/>
      <spinlocks state="on" retries="8191"/>
      <vpindex state="on"/>
      <synic state="on"/>
      <stimer state="on"/>
      <reset state="on"/>
    </hyperv>
- Enable shared memory (this is needed later for filesystem sharing)
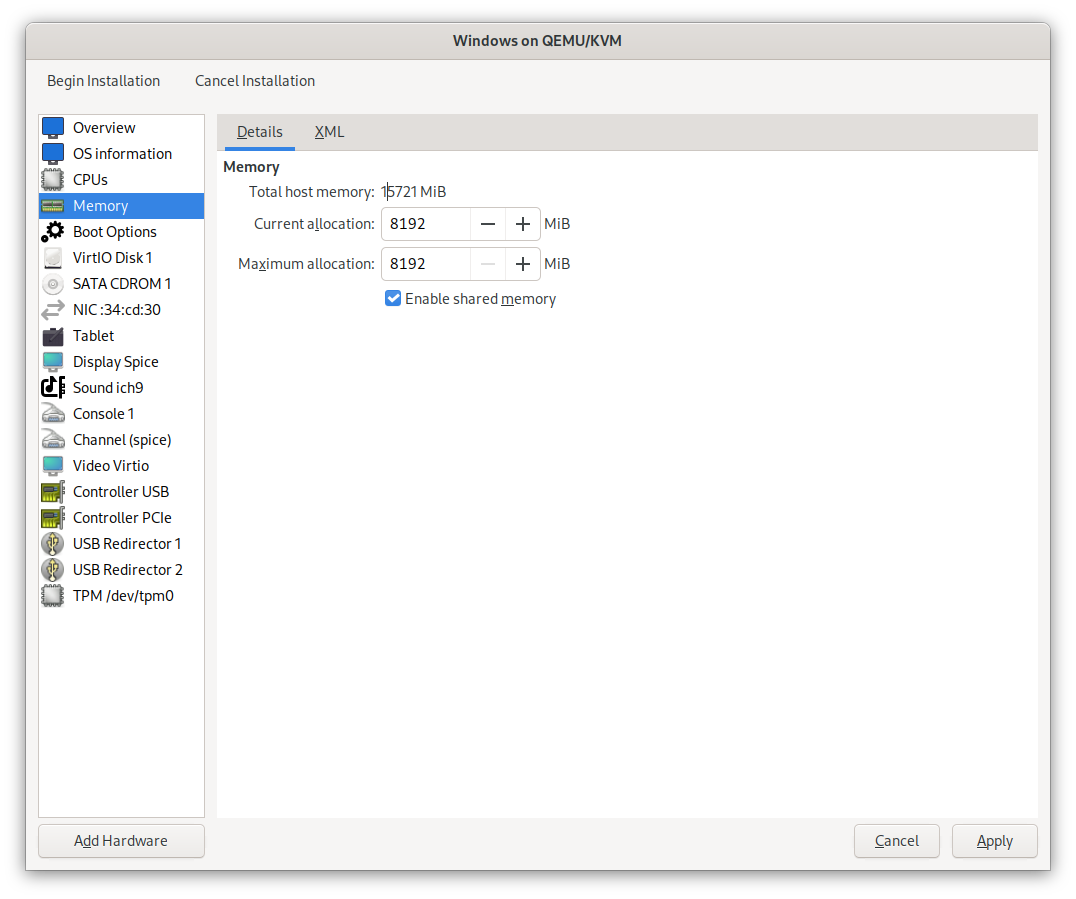
- Add filesystem sharing to your Home directory
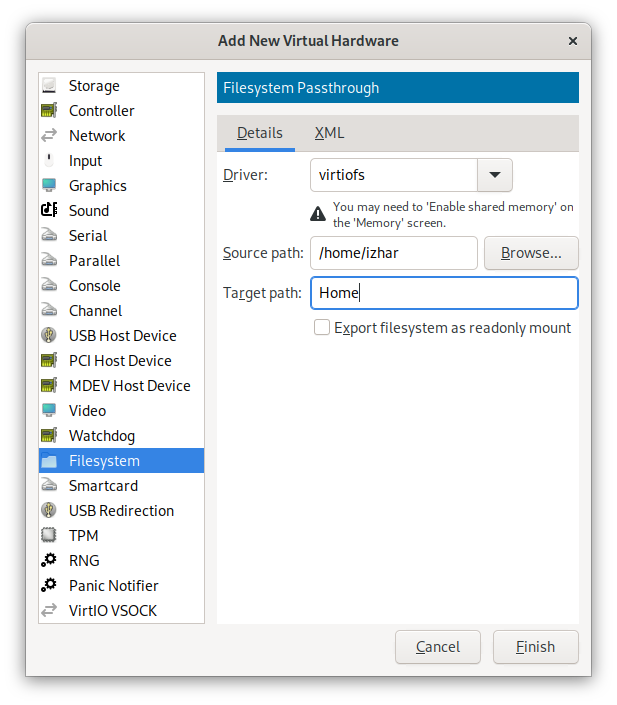
- Then click Begin Installation to start installation.
Make sure you select Windows 10/11 Pro during installation.
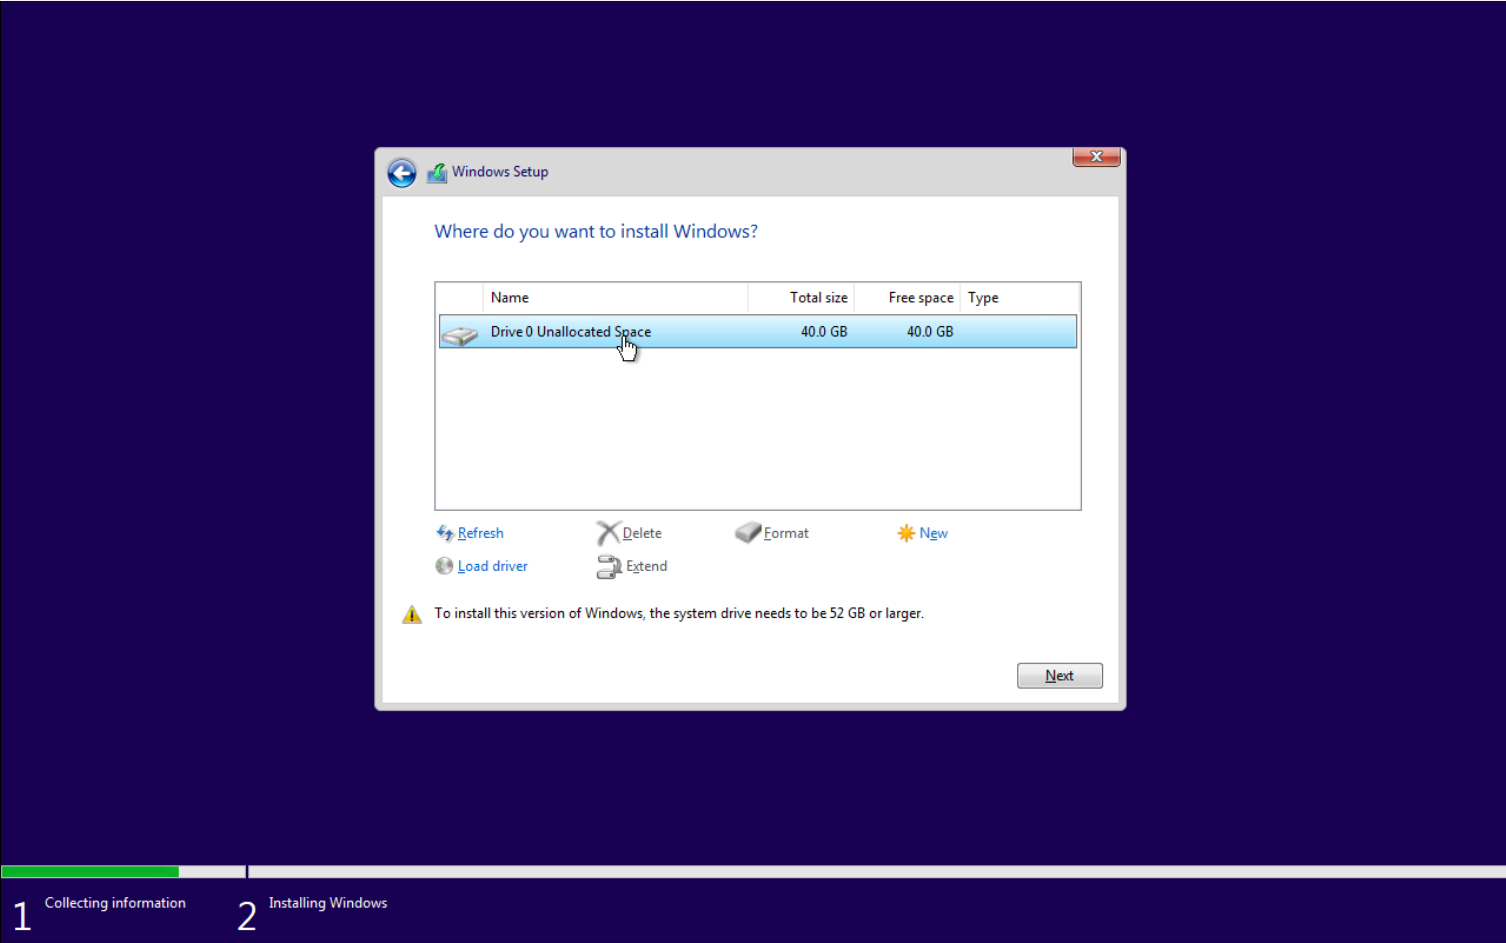
When at the disk selection you will see that there are no disk to select. This is because Windows does not carry VirtIO disk drivers by default. You will need to load the driver from the secondary CD drive.
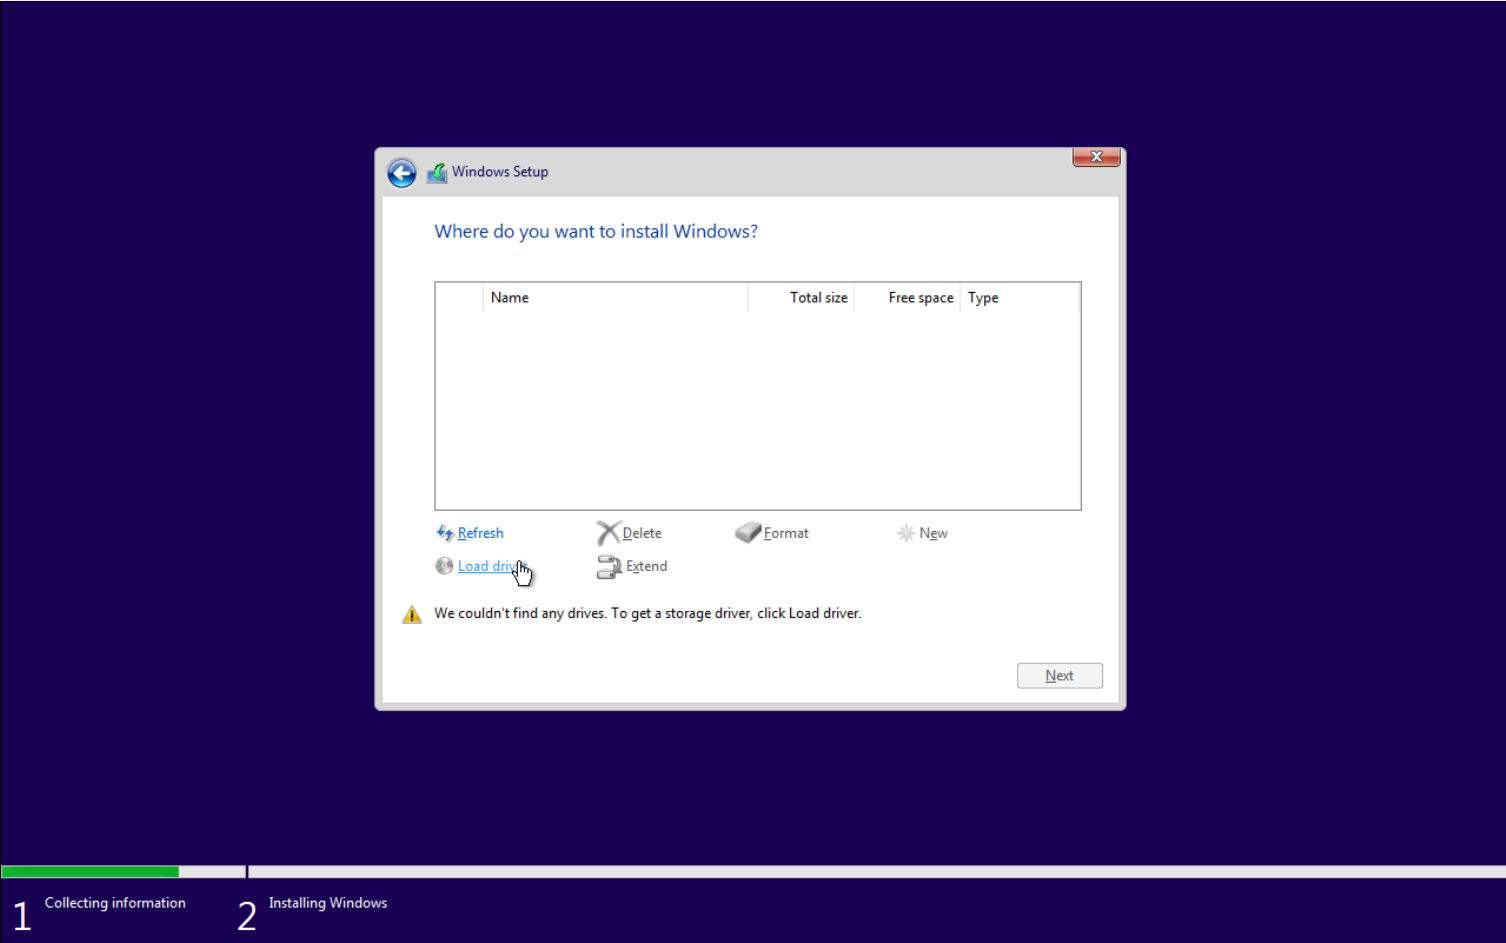
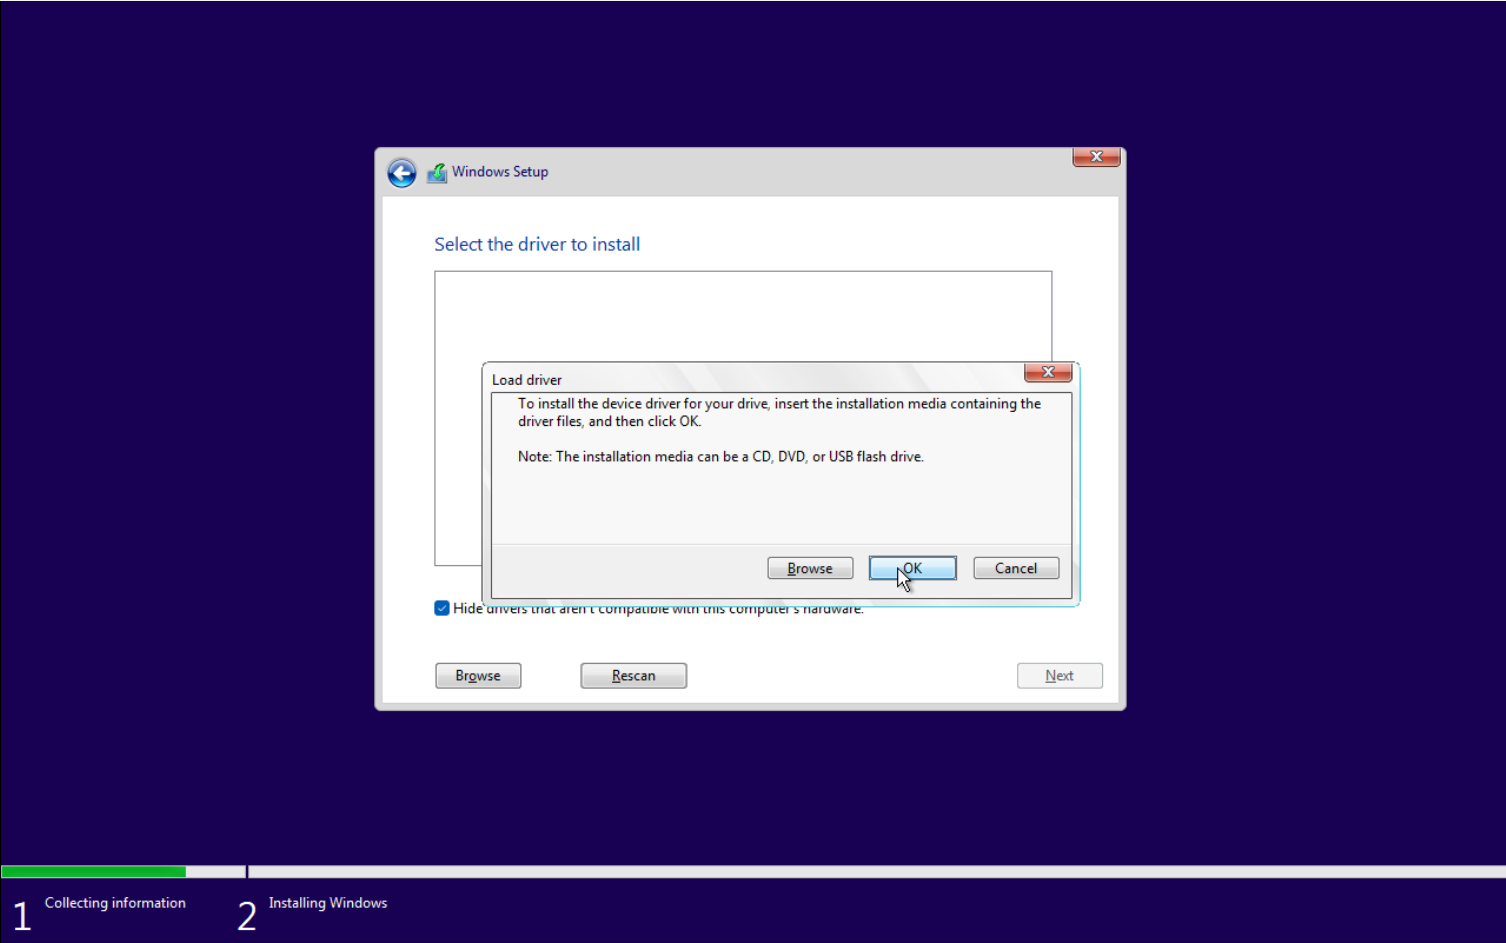
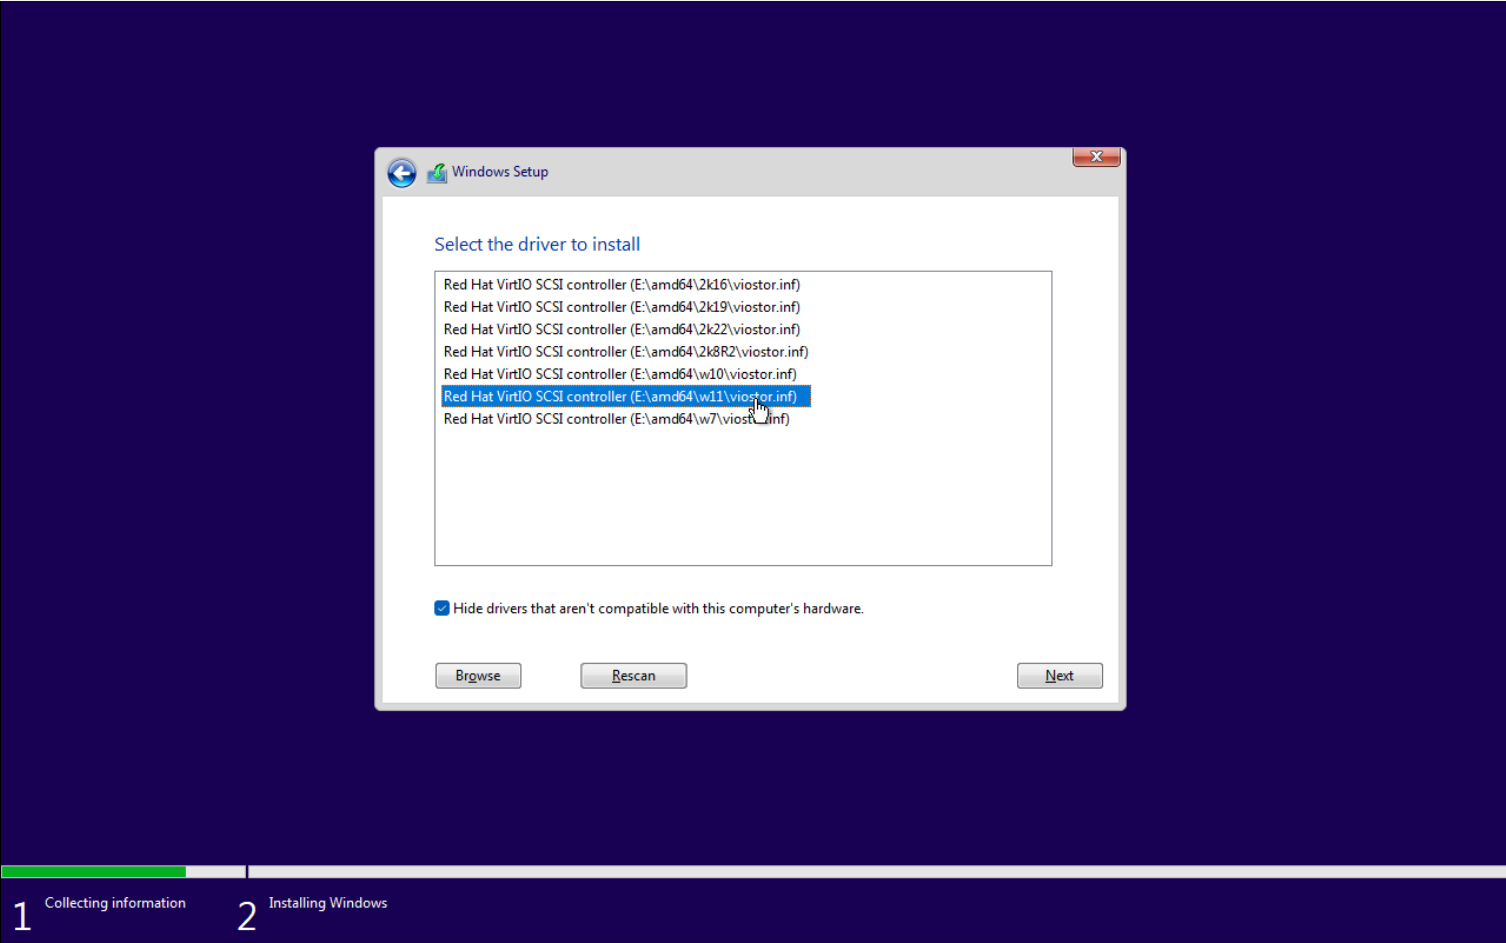
Then proceed the installation as you would normally
On first boot , to improve performance, disable all telemetry monitoring
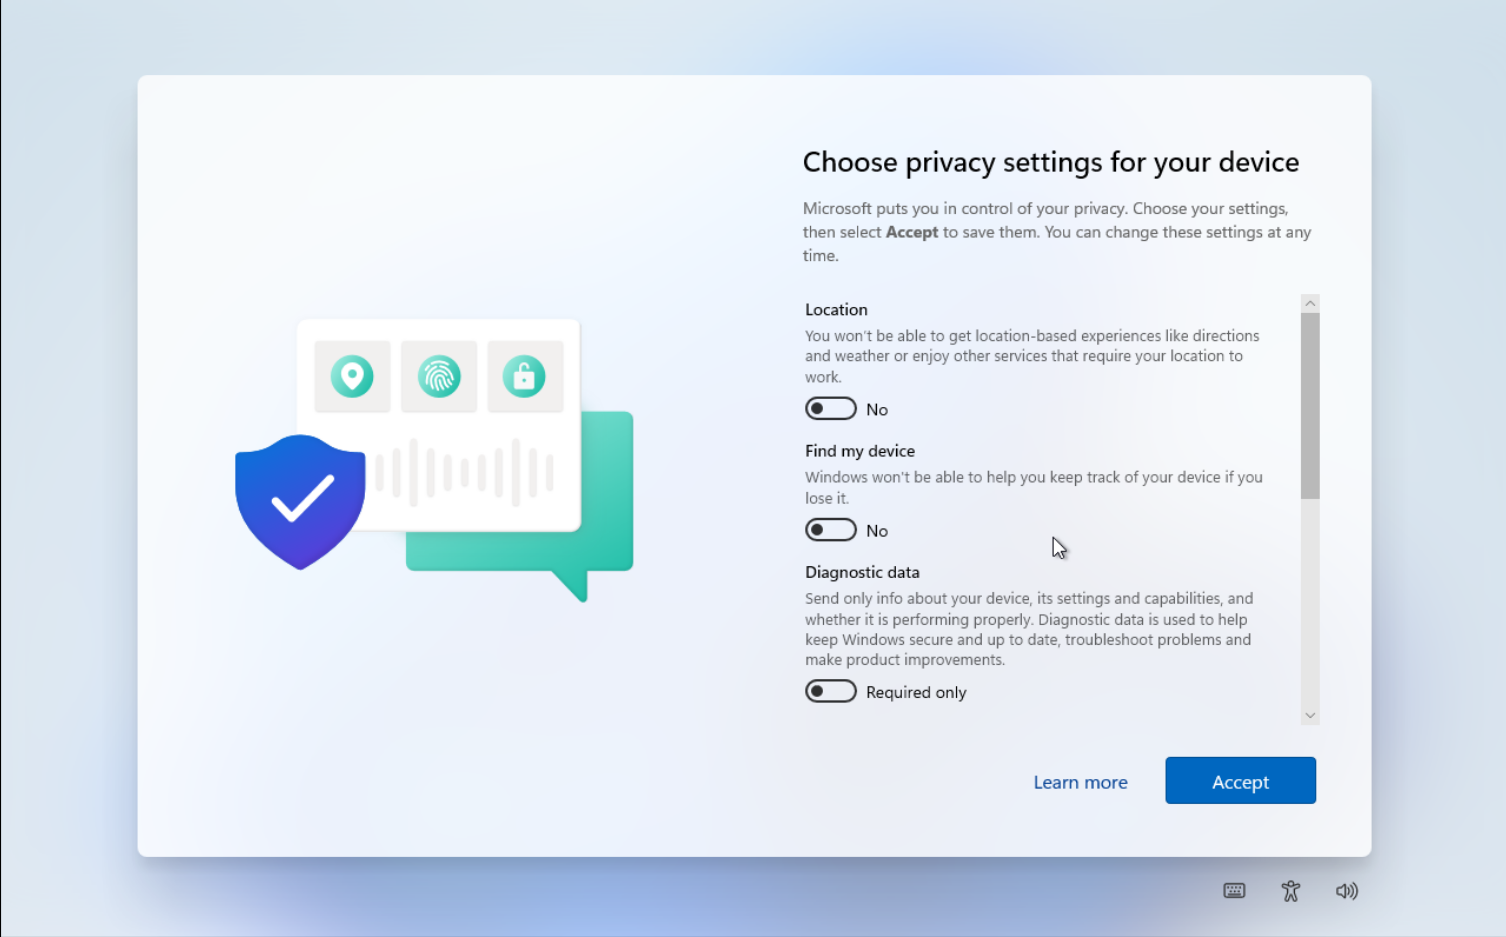
Setting up Windows
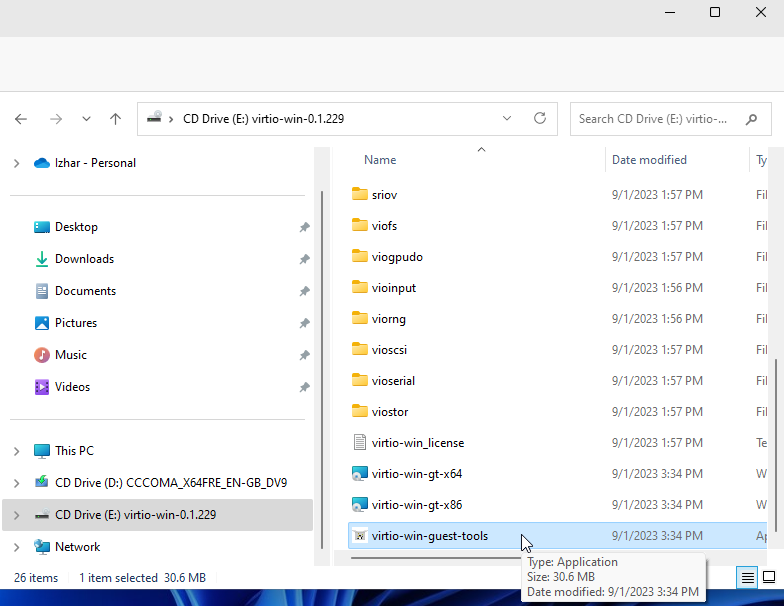
After successful installation, you will need to then install the rest of VirtIO drivers, VirtIO guest tools, and WinFSP to further improve host-guest integration and improve user experience.
- Install VirtIO drivers
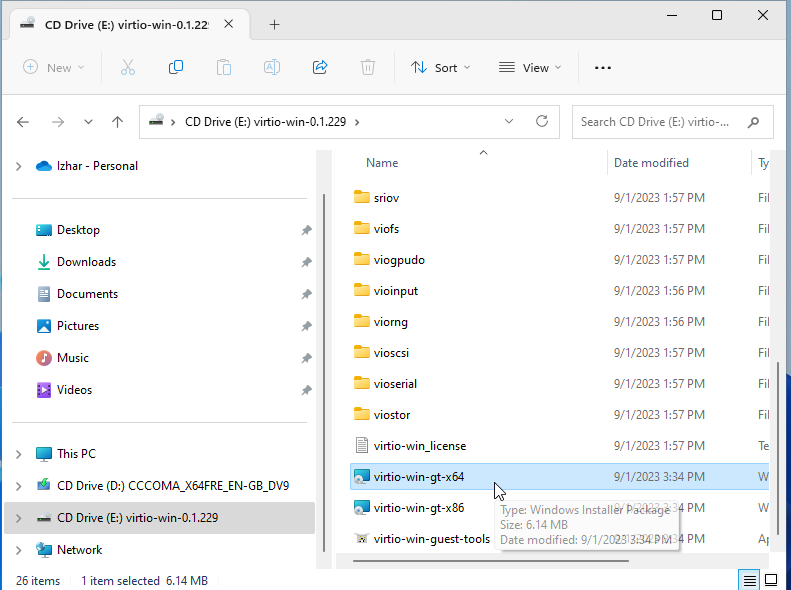
- Install VirtIO guest tools
- Install WinFSP & Enable VirtIO FS
WinFSP (https://github.com/winfsp/winfsp) provide capabilities similar to FUSE on Windows, which allows mounting of userspace filesystems. It is required in order to mount VirtIO shared filesystem as a drive in Windows. Download and install it, then enable VirtIO FS by enabling the following service in the Services app.
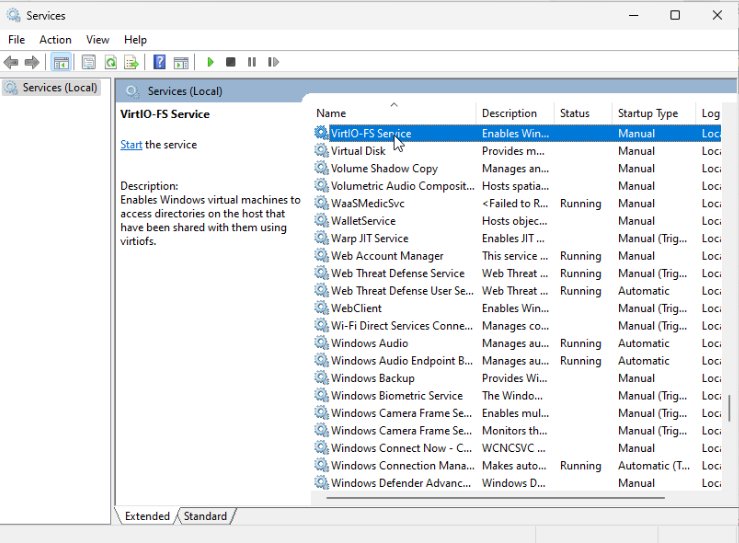
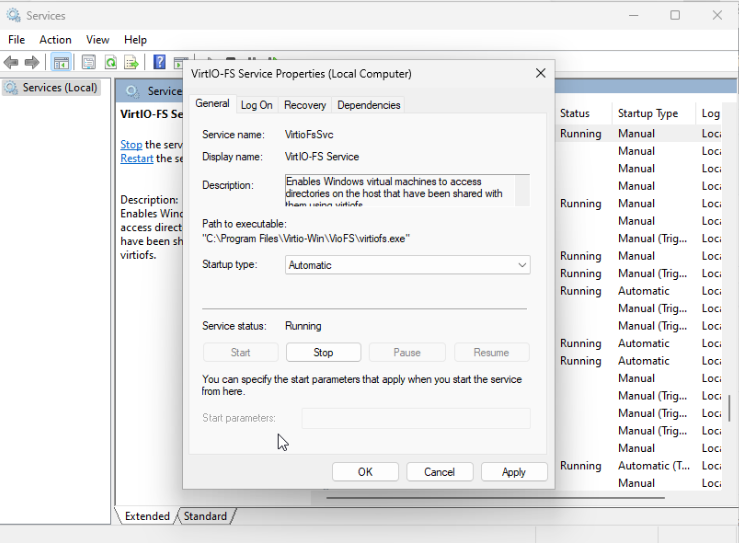
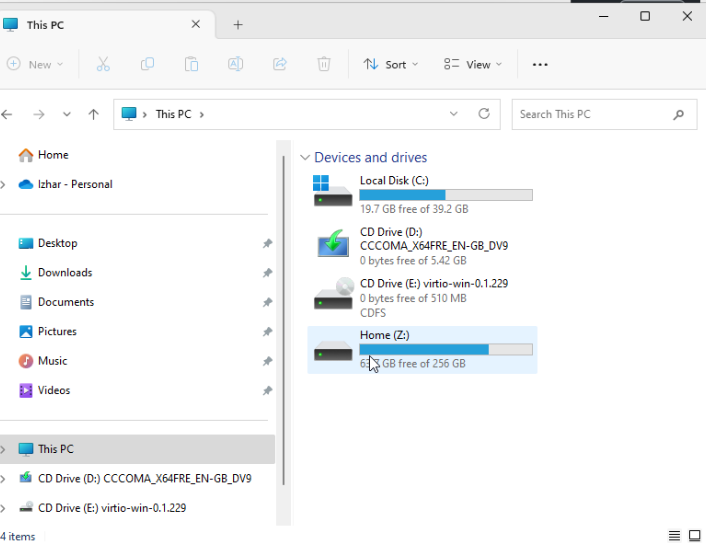
If enabled correctly, you will see that a new drive Z: appeared that links to the Linux host storage
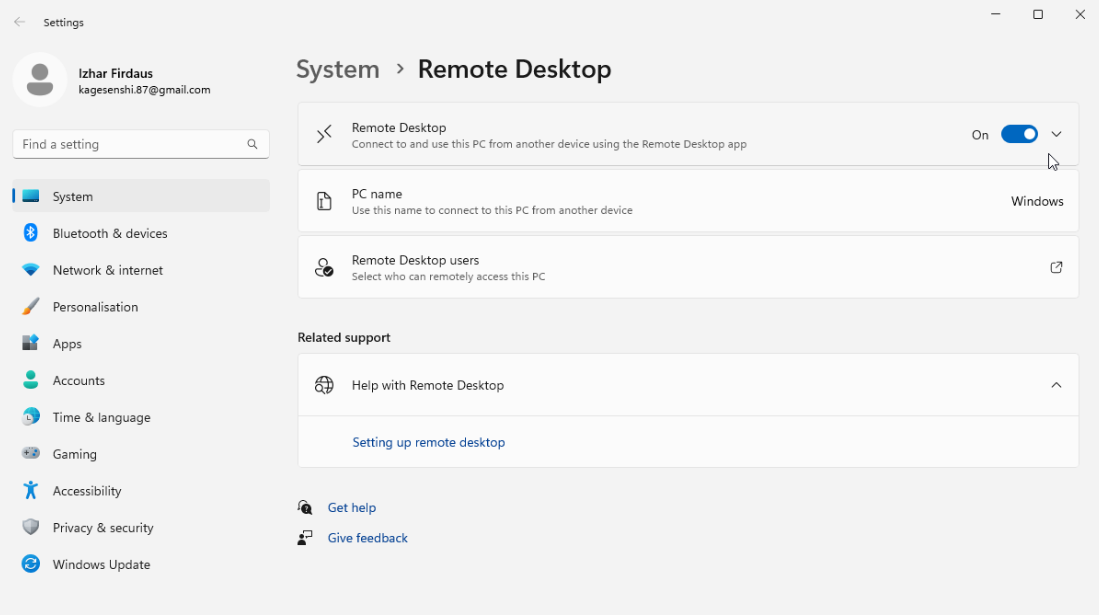
- Then, enable remote desktop
- Afterwards, shutdown the VM, as we now need to switch the network to VirtIO. Open the VM properties and ensure that NIC is switch to VirtIO
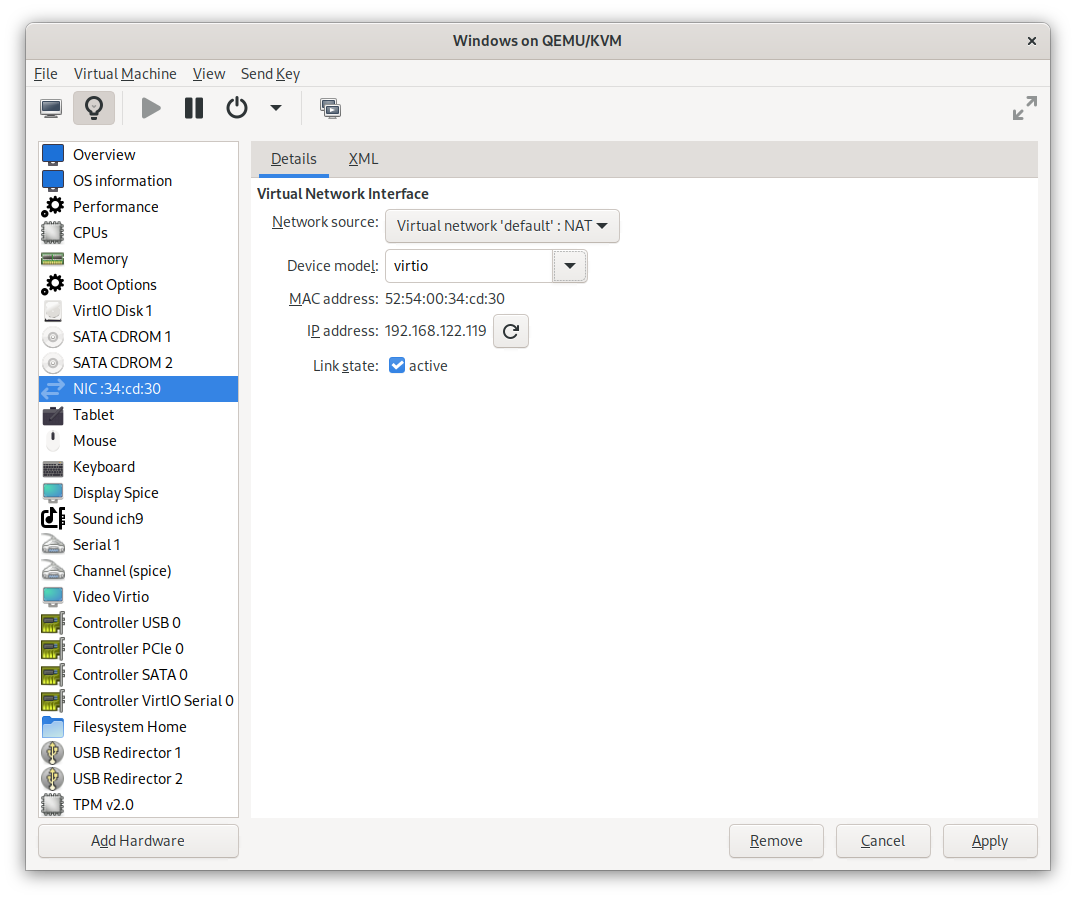
- Now you can start the VM back up.
Connecting to RDP
To connect to RDP, you will need to install Remmina RDP client
Afterwards, setup the connection with following settings
- Basic tab:
- Server: IP Address of the VM
- Username: Windows login username
- Password: Windows login password
- Resolution: Use client resolution
- Network connection type: LAN
- Advanced tab:
- Quality: Medium/Good
- Gateway transport type: RPC
- FreeRDP log level: ERROR
- Audio output mode: Local
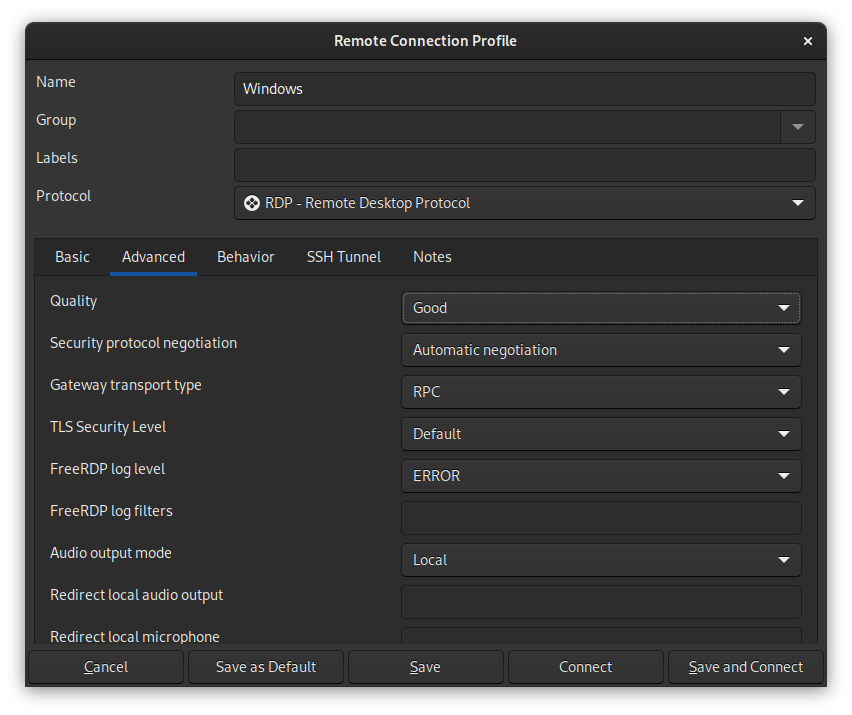
Click Save and connect., and you now have connected to the VM and can use it. Switch to full screen view to make things appear as if it is not a VM.
The VM is now ready to be used to install Microsoft Office.
Optimization & Tuning
For less CPU and RAM usage, you may want to also do the following:
- Uninstall Microsoft 365
- Uninstall Microsoft Teams
- Uninstall OneDrive
- Uninstall ClipChamp
- Uninstall Microsoft Todo
- Uninstall Microsoft News
- Uninstall Xbox related packages
If you are on GNOME and is used to use top right hot corner for window switching, you may also want to install Winxcorners, and set top left corner to open Task View.
Conclusion
Windows-on-Linux virtualization have improved significantly today that it is possible to run Windows VM with minimal impact on performance. Open Source RDP
clients also have catched up quite well in bringing smooth integration of audio and clipboard with remote Windows connection that it become pretty seamless to use
Windows applications through RDP, especially for work related applications such as Microsoft office.
Using this method, one more barrier of adoption of Linux as primary operating system is solved as it is relatively seamless to work with documents in the VM, that
it barely feel like Microsoft Office is running in a VM.
References
- https://linuxhint.com/install_virtio_drivers_kvm_qemu_windows_vm/
- https://leduccc.medium.com/improving-the-performance-of-a-windows-10-guest-on-qemu-a5b3f54d9cf5
